Friday, December 14, 2018

Quilting a Comfort Quilt Finish

One of the first things I did when I got my new Bernina 770QE, on November 19, was play with quilting. My Comfort Quilt top - made during Amy Ellis's AmysCreativeSide quilt-along - has been ready for quilting since June.

This 72" X 95" quilt was the perfect opportunity to play with all kinds of quilting!

As I started quilting, I first used the walking foot (came with the 770QE) to stabilize a row of blocks. Then, curious about the dual feed feature, I tried quilting with it and the standard #1D foot to stabilize another row of blocks... and couldn't tell any difference between the walking foot and dual feed! It's a toss-up as to which is better.

My Bernina dealer, Sharky's Vac 'n Sew in Wildwood, included a Queen Supreme Slider with my machine, to help with the slide-ability of the quilt.

For free motion, I began quilting with the Bernina Stitch Regulator (BSR). It works fine... except I don't work well with it! My theory is - and some other quilters agree with me - that however you learn to free motion quilt... well, that's the method you will do best/prefer.
Bernina Stitch Regulator
It's certainly true for me. I learned free motion quilting in the late 1990s, long before machines had regulated stitches. So, I find the BSR limiting. Still, I used the #2 BSR option to quilt an entire section of the quilt. 

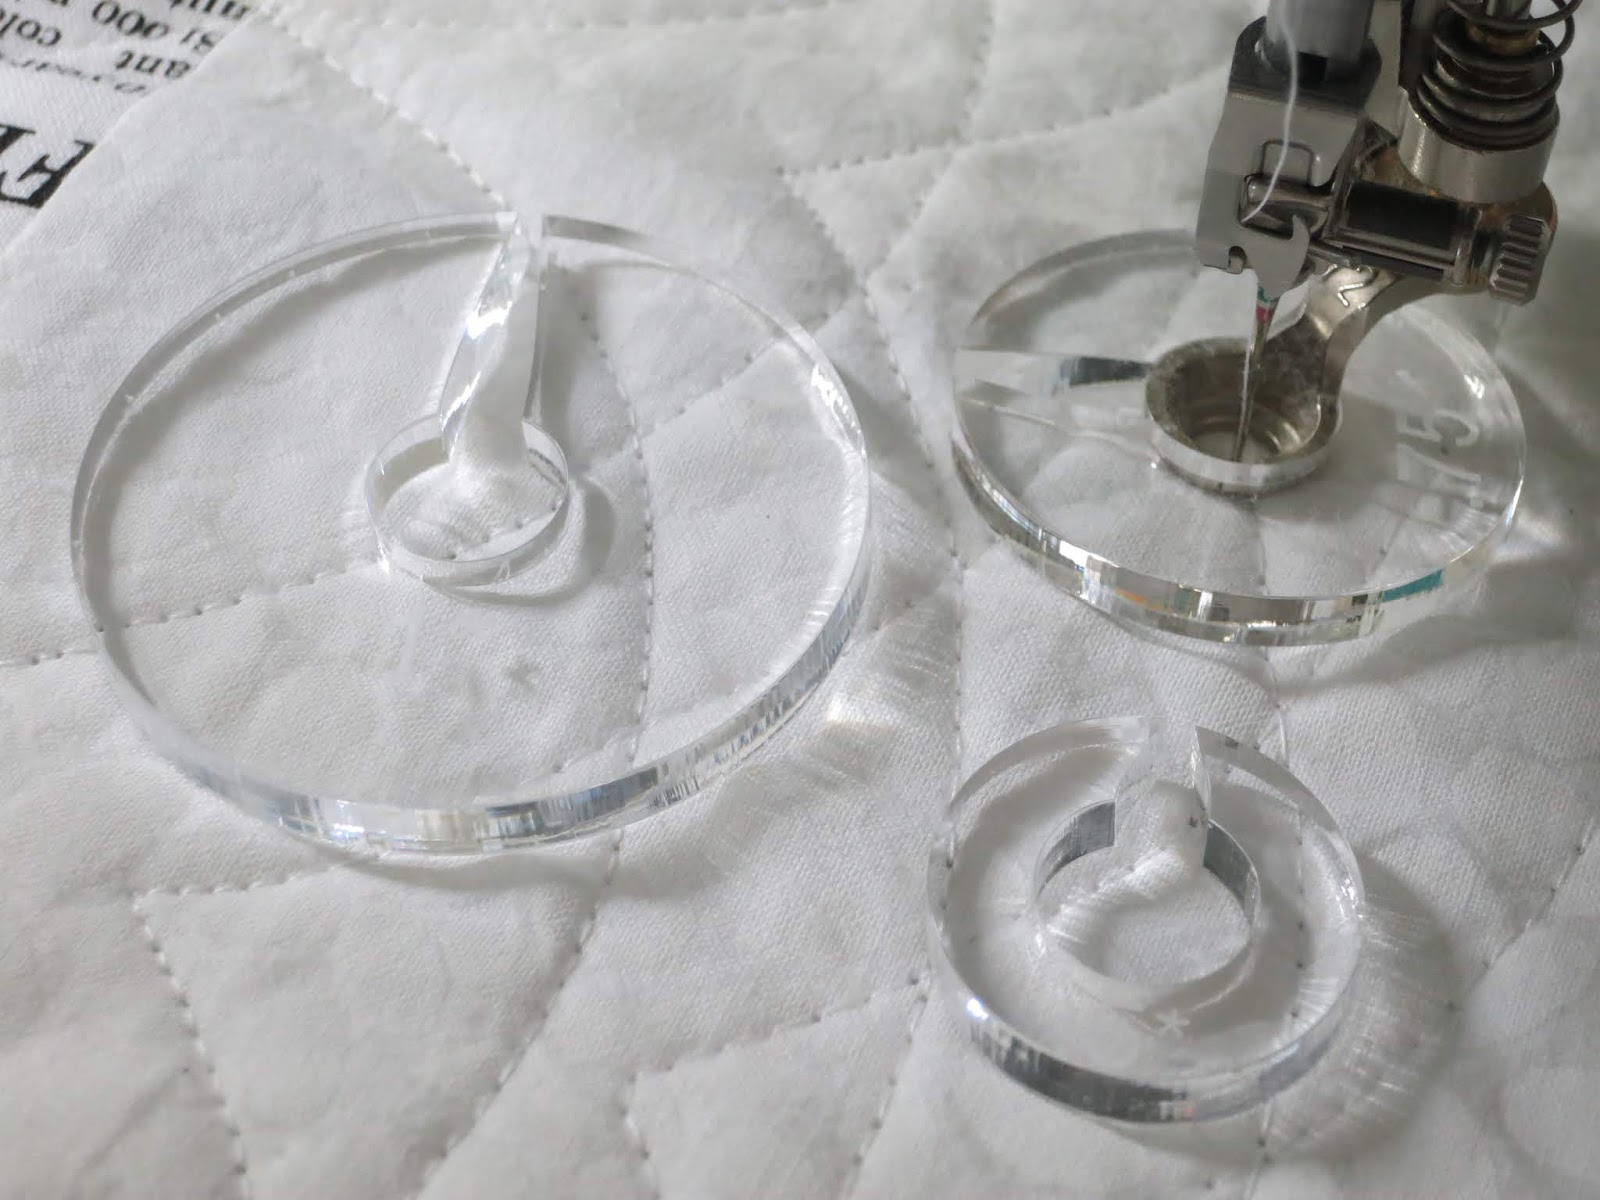
I was especially pleased about being able to use my #72 ruler foot on this new machine, even though it was purchased for my Bernina 440QE. The 10" harp (distance between the sewing machine needle and the body of the machine), and the flat sewing machine bed makes ruler quilting easier. 
I use Quilter's Rule quarter-inch thick nested circles. 
As pretty as it is to quilt circles, I don't recommend quilting concentric circles - too many starts and stops... and thread-burying.

I used an arc-shaped ruler to quilt curves in one section.

Then I added an echo foot to the ruler foot, as a guide for repeating the curves.
A set of echo feet, for a ruler foot, is about $10.

This section is also ruler quilting using a straight edge ruler. 

The clear #29 foot from my Bernina 440QE also works on the 770QE. I'm happy about that because this is the foot I tend to use most often. 

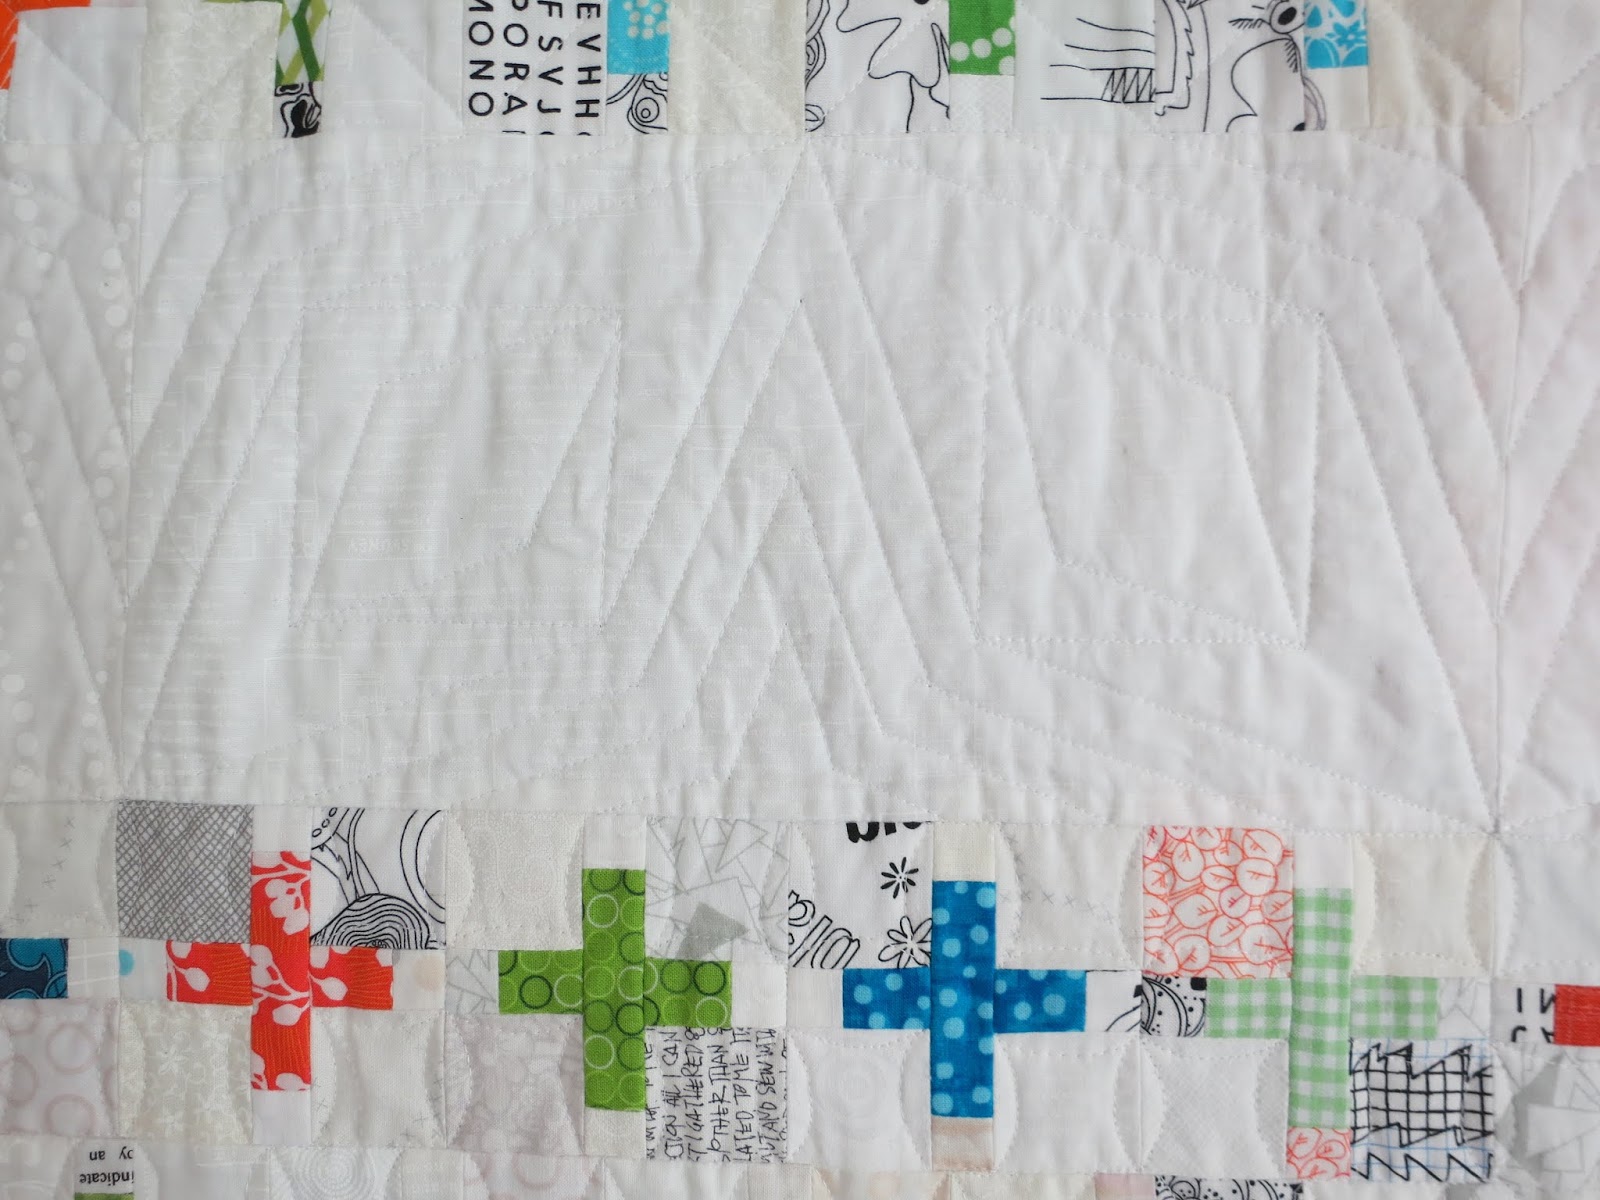
Free motion quilting, without marking, is my favorite way to quilt.

Waves change directions around each plus sign.


Hooked swirls are quilted all over these plus signs. 

To piece the backing, I used a leftover bit wide-back that wasn't wide enough! These triangle-shaped prints remained from piecing another quilt backing, and worked well to stretch the back to the size needed.

Binding fabric was an Alison Glass piece, won in a online giveaway. It has many different designs on it, and I think each was meant to be cut out as a 5" X 5" charm. But I like the way the prints change along the edges. 

The pattern for this Comfort Quilt is in Amy Ellis's book Modern Heritage Quilts.
Comfort Quilt, 72" X 95"
For being a twin size Comfort Quilt, this is especially long. I'll have to find a tall person to gift it to! Linda

Monday, December 10, 2018

Sunny Lanes - A Tutorial

I still follow quite a few bloggers, and enjoy seeing the quilt-y projects they're work on. When I saw this little "Palmateer Point" quilt that AmityQuilter made during a 2017 quilt-along, I couldn't help but notice the 16-patch blocks.

They look like the hundreds of 16-patch leaders-and-enders blocks I've been making...

since 2011, using 1-1/2" X 1-1-1/2" pieces.

Could I adapt my Leaders and Enders 16-patch blocks to this design? I headed to my favorite book of blocks in the public domain.

I found it! Sunny Lanes!


In no time at all, I was playing on EQ8, and piecing.
Sunny Lanes block; 8" X 8" finished

Tutorial
Piecing Leaders and Enders

Sew together 1-1/2" X 1-1/2" squares to make 16-patch blocks, 4-1/2" X 4-1/2" unfinished.

I shorten my machine's stitch length when I'm piecing such tiny patches.

This picture shows the piecing sequence to make a 16-patch block.
Unfinished block measures 4-1/2" X 4-1/2"
Sew together four 1-1/2" X 1-1/2" patches to make 2-1/2" X 2-1/2" (unfinished) 4-patch blocks.
Unfinished block measures 2-1/2" X 2-1/2"
Refer to the end of this tutorial to see quantities needed to make a 62" X 74" quilt.

Piece Half-Square Triangle Squares the "Magic Eight" Way
Make eight-at-a-time 2-1/2" X 2-1/2" (unfinished) half-square triangle squares.

Cut 6" X 6" squares of two different half-square triangle square fabrics. I used Painter's Palette solid white and Moda Grunge in the color Chiffon. It's "sunny!"

With a pencil draw an X from corner to corner on the wrong side of one fabric.

Place fabrics right sides together. Sew 1/4" away from the drawn line, on both sides of each line.

For the next step, cutting apart the block, I like to use my Martelli turntable rotary cutting mat.

Use a ruler to rotary cut on the drawn line, between the two lines of stitching. Do this twice to cut an X through the block.

Without moving the pieces, cut a line vertically through the center of the block, 3" from the edge. Rotate the turntable 45-degrees to make another cut through the center of the block.

The result is 8 half-square triangle squares measuring approximately 3" X 3" square.

Press to open seam. I like to use my Strip Stick to make sure the seam is well pressed.

Trim each unfinished half-square triangle square to measure 2-1/2" x 2-1/2". 


Piece Half-Square Triangle Pairs
Join two 2-1/2" X 2-1/2" unfinished half-square triangle squares as shown to make right-slanting pairs. 

Join two 2-1/2" X 2-1/2" unfinished half-square triangle squares as shown to make left-slanting pairs. Turn vertically to become right-slanting, as needed for Row 2 (see below).
I didn't want to make 8" X 8" Sunny Lanes blocks because 4-patch blocks end up side-by-side (forming another 16-patch block), and broken diagonal angles, as seen in this EQ8 layout.
This layout measures 16" X 16" finished.
Rather, I prefer a layout alternating 4-patch and 16-patch blocks. Hopefully, you can see the difference between the two. (This layout is similar to AmityQuilter's, without borders.)
This layout measures 14" X 14" finished.
So, while designing in EQ8, I realized that piecing needs to be row-by-row (horizontally). 

Piece Row 1
Join: 
 - a 4-patch block
 - a right-slanting half-square triangle pair
 - a 4-patch block
 - a right-slanting half-square triangle pair... and so on for the quilt width you desire.

End with a 4-patch block. 

Piece Row 2
Join: 
 - a right-slanting half-square triangle pair (pieced left-slanting, but when turned vertically is right-slanting)
 - a 16-patch block
 - a right-slanting half-square triangle pair.
 - a 16-patch block... and so on for the quilt height (length) you desire.

End with a right-slanting half-square triangle pair. 
Continue piecing in the same manner, alternating row 1 and row 2. End the quilt top with row 1.
Sew together these units, being sure half-square triangle pairs are slanting the same direction.

Join rows to complete the quilt top.

To make a 62" X 74" Sunny Lanes Quilt
Piece 1-1/2" X 1-1/2" Leaders and Enders blocks into:

144 - 4-patch blocks
132 - 16-patch blocks

Make Magic Eight 2-1/2"X 2-1/2" (unfinished) half-square triangle squares with:

2 yards - solid white
2 yards - Chiffon Grunge 

Cut:
72 - 6" X 6" squares of solid white
72 - 6" X 6" squares of Chiffon Grunge

Use Magic Eight method shown in the tutorial to make 574 - 2-1/2" X 2-1/2" (unfinished) half-square triangle squares. 

Make Half-Square Triangle Pairs

Join 2-1/2" X 2-1/2" (unfinished) half-square triangle squares to make:
144 horizontal half-square triangle pairs
143 vertical half-square triangle pairs

Total - 275 half-square triangle pairs measuring 2-1/2" X 4-1/2" (unfinished)

Below is the 68" X 74" (finished) layout in EQ8 with a link to print this diagram for yourself, in case you'd like to color or count blocks for the size you want to make.

Here's my progress so far. Eleven rows done; 14 more to go!

Whew! Guess you know what I'll be working on for a while! Linda

Friday, December 7, 2018

WIPs Again

Hey there, friends! I'm sending a really big thank you to those of you who have taken time to listen to Episode 402 of the American Patchwork and Quilting Podcast that aired last Monday. I appreciate your many lovely compliments. My heart was warmed!

This is on Pat Sloan's blog....

As I thought, I was the third person interviewed on that episode. If you'd like to listen, access it here.

Locally, Villagers are in the throes of "party time." This is when every club and activity group has it's holiday social. All my groups are doing just that.

This past week found me at parties for: 1) Line Dancing for Exercise; 2) a neighborhood Christmas party where I joined 30 people performing with the Ukulele Performance Group; 3) a holiday social/play time with the Ukulele Players Club; and 4) another party with the Friday Line Dancing for Exercise group.

Three more parties are next week! Those are: 1) the French Oak Ladies luncheon (at a restaurant); 2) the Central Florida MQG holiday party; and 3) Big Cypress Quilters holiday social! And all those are just on Monday and Tuesday! I'm choosing not to join the Zumba holiday party on Wednesday. (Seems a bit counterproductive to work-up a Zumba sweat and then eat treats, doesn't it?) All this partying now means I've been baking - brownies and blueberry pie bites. Yes, me. The one who doesn't.

Parties around here are usually over by the second week of December, which seems sort of unnatural. But, group leaders do this because many people go north for the holidays, or have family here for the holidays. We don't do either, so the next few weeks will be very quiet.

I've been in my sewing room in between everything. Still lovin' my new Bernina 770QE!

I've now pieced dozens of these 4-1/2" X 4-1/2" (unfinished) triangle-in-a-square blocks (made with a Bloc Loc template set) to see if I can make something of all this on my design wall. The circles are quarter-circles, and are cut using a Classic Curves Ruler.

It's a little chaotic, I think. Though I do love all the solid colors! Happily, I've reduced the quantity of solid scraps in my scrap bin. 

I'm also trying this layout. I like the "arrow" appearance, but still think the whole design needs an eye-resting place.

While that's been percolating on the design wall, I've pulled out my 1-1/2" X 1-1/2" (unfinished) leaders and enders to make more 16-patch blocks. I've got 98 of these 4-1/2" X 4-1/2" (unfinished) blocks and will show you soon what I've been doing with them. 

I'm putting together a tutorial. 😊 Linda

Saturday, December 1, 2018

On the Radio, with Pat Sloan

On The Radio...  No, I don't mean the Donna Summers song, but I bet I've planted that ear worm!

Actually, I'm on the radio - the American Patchwork and Quilting Podcast.

Pat Sloan phoned and interviewed me in early November, and Monday, December 3 is the date that episode is aired.

Tune in HERE at 4 pm (Eastern time) Monday, if you'd like to hear it "live."

Otherwise, after 6 pm anytime you can hear it on Pat Sloan's blog/podcast show site: Episode 402

Pat and I mostly talked about my recent creativity focused on wedge quilts.
Roulette, 52" X 69"
Spin Art, 66" X 66"
(Just between you and me... I entered both these quilts into QuiltCon 2019 in Nashville. Should know by late December whether either has been accepted.)

Pat and I also talked quite a bit about the many First Time Quiltmaking classes I've taught (more than 30!), the more than 1000 quilts given to missions around the world, and the book I wrote by the same name (published in 2009 by Landauer Publishing).

Every American Patchwork and Quilting podcast includes interviews with several quilters. I was tickled to learn that one of the other interviewees on this particular episode is Heather Black (Quiltachusetts). Heather is a young, modern quilter with mad design skills. She talks about "Urban Trek," a wildly successful quilt design that has appeared in a dozen or so shows, and one that - oddly enough - I made myself in 2017!
My version of "Urban Trek," 59" X 71"
I think you'd be safe saying that I'm a Heather Black fan, so it's an honor to be on the same program as she.

Hope you'll listen-in if you have some time to burn.  Linda

LinkWithin

Related Posts Widget for Blogs by LinkWithin