Showing posts with label Supernova. Show all posts

Wednesday, August 10, 2011

Feelin' Blue... and Happy About It!

Oh my goodness! What can I say, but... I'm stunned, and oh-so happy! I found two of my quilts in the "Blue Ribbon Room," at our Iowa State Fair!

This afternoon, between 4-7 p.m. was the "Fabric and Threads" department preview at the Iowa State Fair. It's every entrants' opportunity to see the fair display and find out how their entries "faired." 

My first blue ribbon was for this quilt, designed by Kellie Wulfsohn of "Don't Look Now" blog (Australia). It won not only a blue, first-place ribbon, but "Best Wall Quilt," an award given by Des Moines Area Quilters Guild that carries a $25 prize!

Here's that 22" X 28" quilt when I blogged about it in September, 2010.

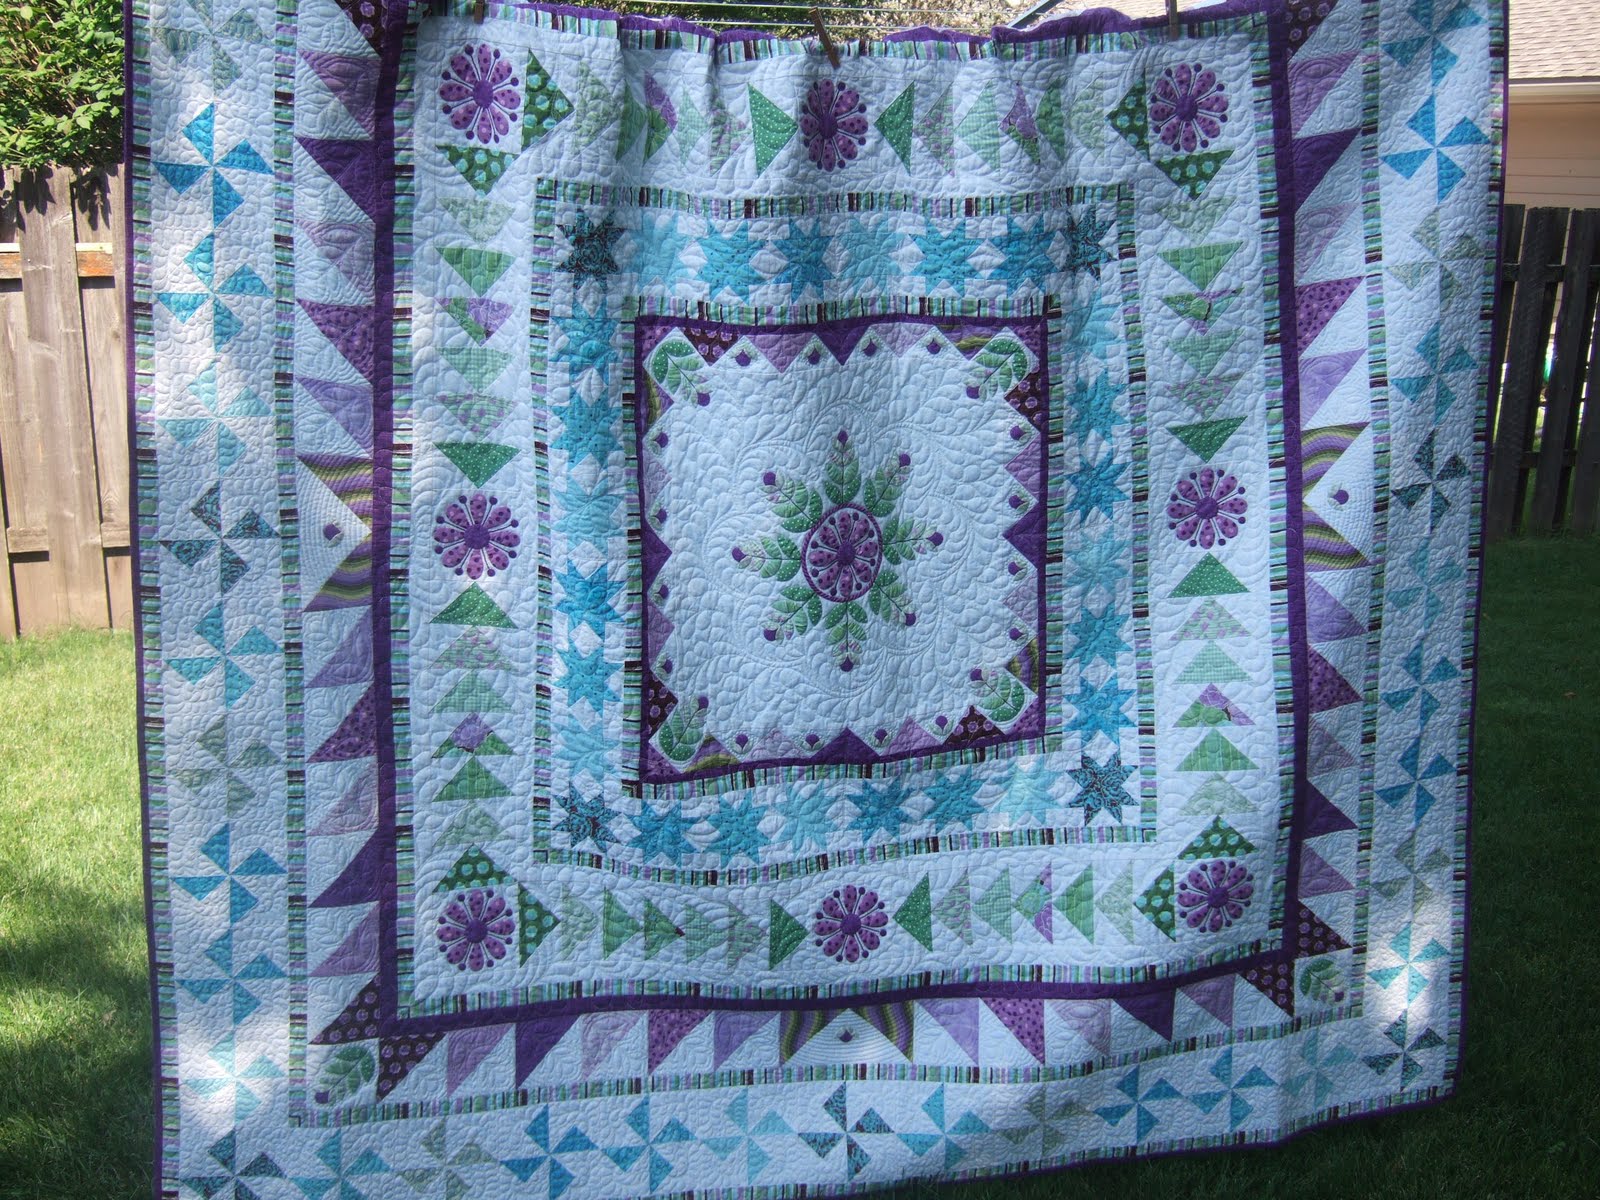
My "Snowflake Medallion" quilt, a design by Emma Jensen of Ballarat Patchwork (Australia - Do you see a winning theme here?) also won a blue ribbon!

This 77" X 77" quilt represents my best sit-down quilting efforts to date. I owe many thanks to Wendy of IvorySpring blog whose free motion quilting inspired me to try some new things - wool batting and Sulky thread to name two.

Here's the quilt as I blogged about it last month.

My third and last 2010 Iowa State Fair entry was "Supernova," a quilt-along led by Lee of Freshly Pieced. This quilt garnered a fourth place ribbon.

Here's the quilt in its entirety, as I blogged about it in May.

I am extraordinarily happy! I looked through my ribbon box and the last time I earned a blue ribbon for a quilt entered into the Iowa State Fair was back in 2004 for a small batik pineapple wall hanging. It's tough to get into the "Blue Ribbon Room," so I especially cherish these ribbons. But these wins are certainly not about the money! I'll receive $7 for each of the two blue ribbons, and $2 for the fourth place ribbon. Yet, I feel rich!*

Right now I'm feeling very grateful for the creative talents of Australian designers Kellie and Emma, and for Wisconsinite Lee. I don't have a gift for coming up with original designs, but I guess I do okay at interpreting others' designs!

Even more, I am thankful for you my blogger friends. Thirty-one of you took the time to comment, offering encouraging remarks about my Snowflake Medallion quilt. You are truly my best friends! 

*"...but the rich have many friends." Proverbs 14:20b (NIV 1984)

Thank you, thank you! Linda

Monday, May 9, 2011

Supernova Binding and Finish

I've completed my Supernova quilt, and couldn't be happier with it. I thought I'd share with you how I add binding to a quilt. (This will be a refresher for you long-time FlourishingPalms subscribers.) The binding method I use isn't my own, but it's unique. I encourage you to try it. I'm so partial to it that my tutorial is here (or find it on the menu tab "Seven Quilt-y Tutorials"). 

With this method of sewing binding to a quilt, binding isn't sewn to the quilt continuously (folded at the corners). Instead, four separate binding strips are sewn to each of the four sides of the quilt. Here's a picture of a corner showing two tails of two binding strips.

After I've sewn each strip to the quilt, all four corners look just like this one.

The best part about this method is that each corner has a machine sewn mitered corner.
How neat is that!?

After trimming away the binding fabric at each corner, and removing the excess backing and batting, you simply turn the corner to the outside to get this pretty finish. Now you're ready for relaxing hand sewing.

Voila! The finished quilt. 

I love these pictures of it blowing in wind on a pretty spring day in Iowa.

I think you can see some of the quilting too.


I'm very pleased with Supernova which finished at 62" X 62".

A huge thank you from me to Lee at FreshlyPieced in Wisconsin who designed this quilt and offered making it as a quilt along. For me, it was a wonderful opportunity to sew with solids after believing - since the 1980s - that solids were used only in Amish quilts! I can make a nice-looking quilt using a solid!

If you'd like to see more Supernova quilts, check them out here on Flickr.

Oh! And I try really hard not to forget to sew a label onto the back of every quilt I make. I hope you do too.
Linda

Friday, May 6, 2011

Basting and Quilting Supernova

It's been fun to participate in the Supernova Quilt Along. Lee's been posting steps every Thursday, and a week ago, we received our last instructions: "It's time to quilt." 

Since I'm a sit-down quilter, pin-basting was my first step. Several years ago I learned that when you pin-baste a quilt, you shouldn't line-up your pins or pin in a grid pattern. If you insert pins in a uniform pattern, you're putting tension on one particular area and leaving gaps in other areas. If you pin randomly, all areas have some tension.

To fit the solar/space-like appearance of the pieced quilt design, and in keeping with the "nova" theme, I decided to use my 1/8"-thick set of nested oval templates to trace oval quilting patterns. Also, the curved shapes contrast with the linear piecing - one of the quilting concepts I like to follow. I used a white chalk-o-liner and a wash-out marker to draw ovals and circles.

Using gray Aurifil 50-weight thread on top, and gray Bottom Line in the bobbin, I approached this as a sort of quilt-as-you-go. I'd trace and quilt some parts, stop to reassess, and then trace and quilt some other parts.

Along the outside edges, to complete the "ray" look I was going for, I free-motion quilted straight lines. I didn't use a walking foot because I don't have a walking foot for my Pfaff Grand Quilter.

As I've been quilting, I've wondered whether anyone else - or everyone else - marks their quilts after they've pin-basted. Certainly it makes more sense to mark first, so you can see the design in its entirety, and strategically position the safety pins. But on the other hand, if you're using chalk to mark a quilt, it can dust off in the basting process.

For me, it's difficult to picture the whole quilt design. Rather, I first need to see if my idea is going to work. If it does, I can expand it from there. If it doesn't, I can unquilt... though I'd like to think that sort of thing is happening less and less. 

When do you mark your quilting designs? Linda

Thursday, April 21, 2011

Finished with Unfinishing

I'd hope to share a picture of my Supernova quilt, pinned to my umbrella clothesline... gently waving in the wind. Ha! Iowa hasn't yet heard that spring is supposed to be here. We've had endless days of dreariness, strong winds, rain, cold (36F/2C this morning) and no sunshine. It's downright depressing.

Dare I be honest and tell you how many times I re-made blocks for the Supernova quilt? No. You don't want to know that a quilter with 35 years of experience re-made blocks that many times! The latest iteration is the last. I swear it.

I completely removed a dark green block that didn't suit and made a yellow block (upper right) to replace it. Then, I changed fabrics on two blocks, completely removing brown prints. Even now, as I study this, I don't like the green center block that makes my eye stop with its abrupt change from dark green outer patches to different colors in adjacent blocks.
62" X 62" Supernova quilt top
The rejected dark green block has been sewn into the backing.
Supernova backing
This backing fabric was 25 percent off at my LQS. That isn't much of a discount when I can remember $6 to $7 a yard quilting cotton that could be bought half price. I heard recently that cotton prices are stabilizing and I hope that's true.

Though the Supernova quilt is ready to sandwich and pin-baste, I can't baste it just yet. Believe it or not, almost all my safety pins are in this 80" X 80" "Snowflake Medallion" quilt.... and they've been in the quilt since last June! How sad is that?
 
Pretty darned sad, I'd say. It's not that I don't want to quilt it. It's that I don't know what to quilt! It's my same old problem. And I've surely set myself up for failure too because I want the quilting in this one to be knock-your-socks-off awesome. Though I've been looking for, studying, and drawing quilting designs seen on blogs, I'm just not confident in my ability to choose the "right design." There must be a trick to it. Advice eagerly accepted, please!

I find it much easier to sew and piece. Even resewing 120 HST for the "Roll Roll Cotton Boll" quilt wasn't too bad. How nice to have the blocks sewn together now. 
"Roll Roll Cotton Boll" 11" X 11" unfinished block
These 30 blocks are ready to be joined to string-pieced blocks to make the quilt center. Yay!
30 "Roll, Roll, Cotton Boll" blocks
I've made a little quilting progress on "Glinda." Oh how I adore those ruby slippers. I found an interesting picture of the real ones here.


Now, what shall I quilt in the next triangular shaped sections? Lola (whose "Glinda" quilt it is) and I are thinking yellow brick road, kinda like this. One of Glinda the Good Witch's lines in the Wizard of Oz movie is, "Just follow the yellow brick road." Maybe bricks quilted with yellow silk thread? 

"Inspiration. Do come for a nice long visit," says Linda.

Have a blessed Maundy Thursday, Good Friday, and Easter Sunday.

Saturday, April 16, 2011

This, That, the Other, and the Other

My hands have been in a mish-mash of sewing projects past week. It seems that every time I open a bin looking for an item needed for the project I have my hands on, I see another project that needs attention. UFO overload! I feel terribly guilty.

So what do I do? I work on something for someone else. Makes complete sense. Especially when the someone else is a dear friend, (blogless) Linda to whom I gifted for her birthday free motion quilting on this 36" X 36" wall hanging of "Glinda" the good witch from The Wizard of Oz. I'd given Linda (So many "Lindas," I know! When more than two Lindas are together, she's "Lola.") the Glinda panel, and the ruby slippers fabric too. Lola sewed them up with pink Fairy Frost to make this cute thing. The rest of the "magic" is up to me!

Wanting to try curved cross-hatching, as Quilter Extraordinaire Wendy of Ivory Spring blogged about here, I ordered the curved ruler to give it a try on Lola's quilt. I like how the ruler works; it just didn't work for this quilt. I purchased the small, 6-1/2"-long ruler, but for the curve size I needed, I should have had the larger, 10" curve. 

So instead, I straight-line cross-hatched Glinda's bubble. For the first time, and also following Quilter Extraordinaire Wendy's example, I stitched with silk thread on top (awesome stuff!) and Bottom Line in the bobbin. Very nice. I'll be doing that again for sure.
Lola's given her approval, thus far. Next, I must come up with a design for the triangles areas, the ones with the ruby slippers print. Then, those pink Fairy Frost triangles will be filled with cyclonic-like swirls surrounded with more feathery-type swirls. Maybe you can tell that I struggle much more with what to quilt, rather than the mechanics of domestic machine quilting. If you ask me to pick the right design for the space, we're in trouble! But gosh, just tell me the design you want and I'll come through for you.

Another ongoing project is RRCB - "Roll, Roll Cotton Boll" - the quilt along that Bonnie Hunter offered in December. I thought I was making good progress until I started sewing the strips of five HST to the block centers. They didn't fit; they didn't even come close! Turns out that because I'd sewn the HST strips on one sewing machine, and the block centers on another sewing machine, the quarter-inch seams were not the same. Argh.

Not that I'm counting or anything, but those 120 strips of HSTs each have four seams that have to be resewn.

I'm resewing each seam, stitching deeper than the first time, and removing the stitching that's nearest the raw edge. For this tedious stuff I'm putting in IPod ear buds and listening to a book - "The Secret," by Beverly Lewis.

During the last car trip to Kansas City, I stitched most of this block. I forgot to take along floss for the border, so this is a recent finish in my on-going "Snowmen A to Zzzz" embroidery project. The letter "I" is prepped for the next time we hit the road.

My Florida trip in March was the last time I hand-pieced. Since I'd sewed up all the patches I traveled with, I needed to cut more. This time, I added 150-grit sandpaper to the back of the acrylic cutting template (see the red pieces), and that greatly improved my ability to rotary cut without template slippage. I bought the package of 4-1/2" square, adhesive-backed sandpaper from the local home improvement store and used scissors to cut small shapes.

While in Florida, I hand-pieced 36 "Starfish" blocks and have enough of the colorful print for only 9 more blocks. I'm hoping that with the connector fabric between each starfish, I'll end up with a decent-sized quilt. I have no clue how to go about calculating those dimensions!

I'd planned to use the white tone-on-tone print (see lower left) as the connector, but at commentors' suggestions, I'm auditioning solids. From the bottom to the top they are Kona: caramel, palm, charcoal, ash, and snow. With 219 Kaufman Kona solid colors to choose from, with names like: ocean, Carribbean blue, Pacific, lagoon, clouds, champagne, and sand - they all fit with starfish - I don't know how I'll ever decide!

There's one last makeover to address. A kind-hearted quilter pointed out that this block really doesn't fit my Supernova quilt layout. She's right.

So, the green will be out and yellow/turquoise will be in. 

Thursday night the Batting Buds (Not baseball related, but like quilt batting. It's what's on the inside that's the most important part of buddies.) got together. We had a great evening, though they might complain about the "torture" I put them through, teaching them to hand-piece apple core blocks.


Linda (yet another blogless Linda with the nickname "Bug") showed us this "New Life" quilt she made with scraps.

Every print seems to go with the others, though Bug included a full color range of scraps in the 4" X 4" (finished) blocks. Her choice of beige sashing and burgundy cornerstones really pulls it together.

She longarmed it and will add binding next. Bug plans to take this quilt with her, to give away when she goes on a Lutheran Church of Hope mission trip to South Africa in June. Good on you, Bug!

Thanks for sticking around to read through lotsa this, that, the other, and the other. I should stay busy for a while. Linda (the Linda with no nickname!)

Monday, April 11, 2011

Supernova Blocks

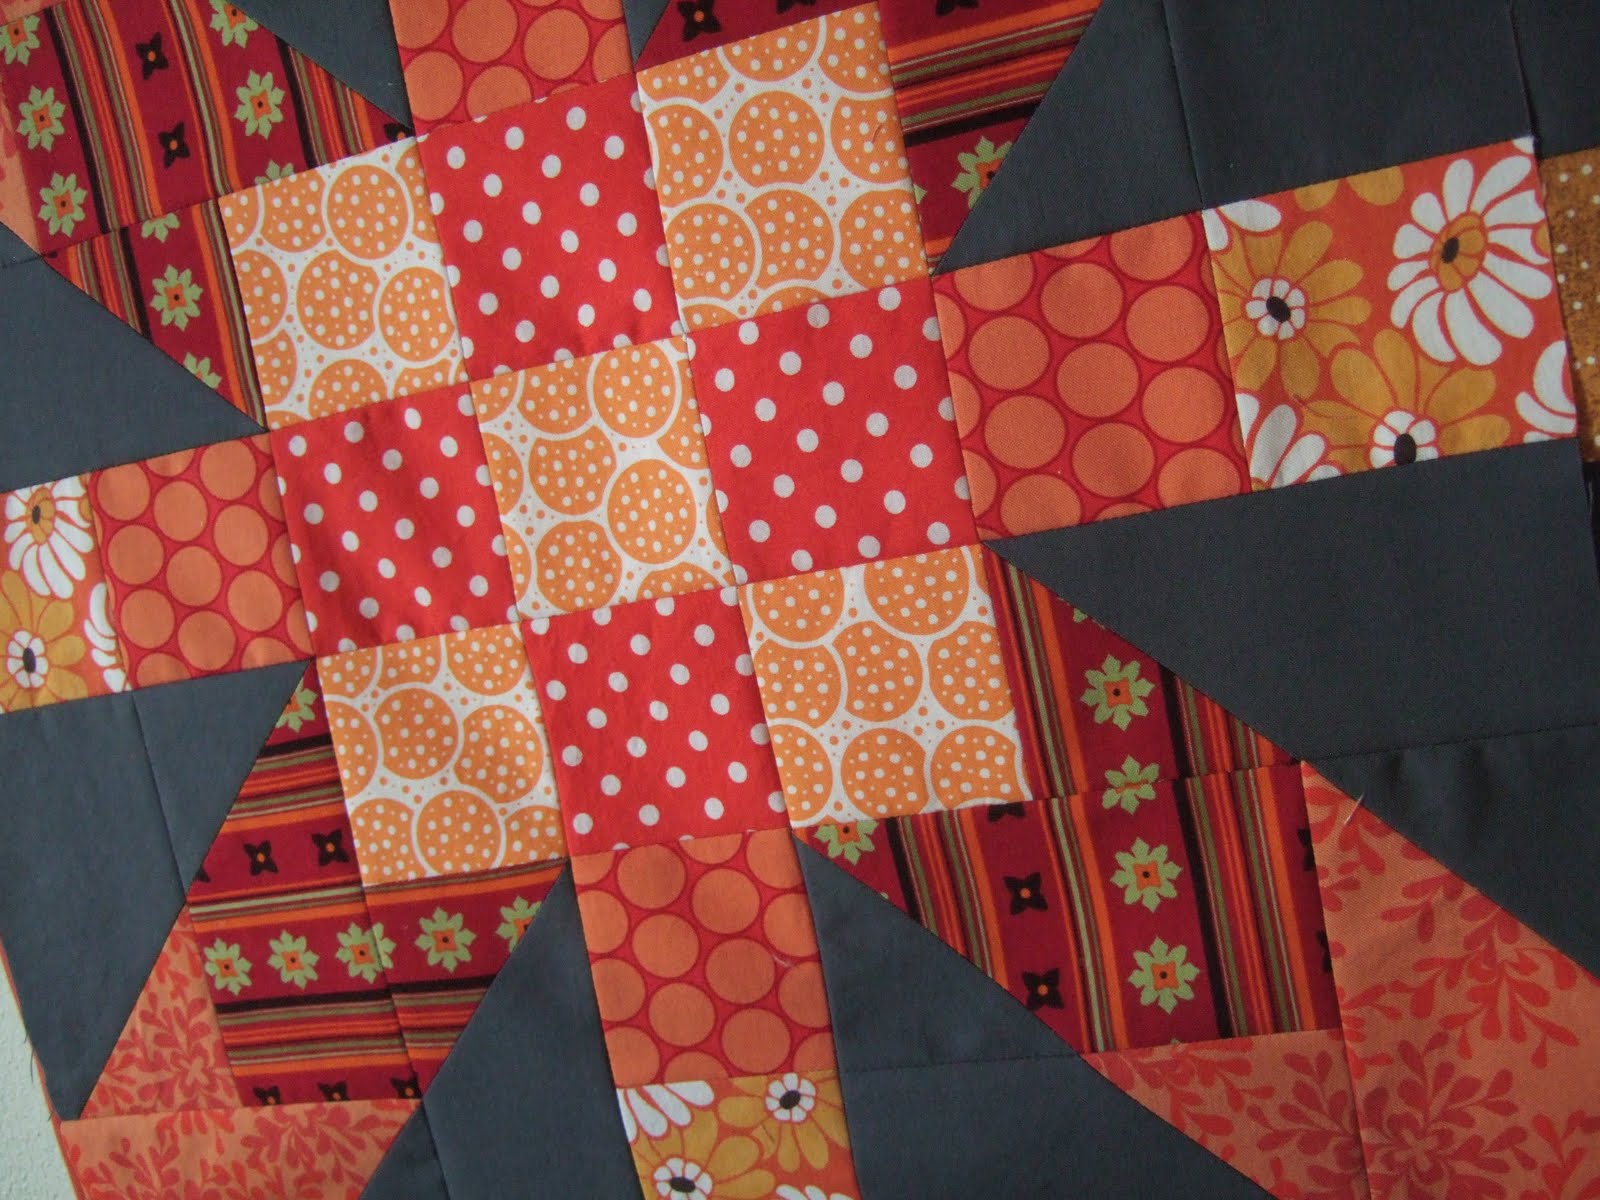
Over the weekend, and after much consternation followed by hours of un-sewing, re-cutting, and re-sewing, I finished making nine 18" X 18" Supernova quilt along blocks.

If you compare them to the patches I showed you in my previous blog post, you'll see there are lots of differences.
What I belatedly realized is that I had pieced the patches wrong. I placed colors in the sequence: light, dark, medium when I should have pieced them: light, medium, dark. I decided which ones to keep as they were...
...and which ones to make-over.

Here's the arrangement on my design wall where I could step back and look - without my glasses, so I could "see" the values instead of the colors. But don't be surprised if I decide to swap around some blocks before I sew them together!

The rest of Lee's instructions to complete the Supernova quilt top will be released Thursday. Hopefully by then I'll have the coal-colored Kona solid I need to complete the top! I've had issues getting the fabric. First I ordered it, sight unseen, from an Iowa quilt shop about an hour north of me. The fabric arrived and it's a Kona solid that's darker than coal. Then, I tried re-ordering it from where I'd ordered it in the first place - Fabric.com. Using the same item number from my previous order, I received an aqua-colored Moda Marble! That issue hasn't been settled yet.

In the meantime, I'm relieved to restore order to my sewing room. These are the piles of rejected, over-cut and unused pieces. What should I do with all of them? I really don't want to sew that big pile of gray solid and print triangles into half-square triangles. But I might be willing to cut 3" squares from the remaining pieces, to add to the pile of 3" squares there in the middle. And then maybe make a patch quilt? What do you think?
Linda

LinkWithin

Related Posts Widget for Blogs by LinkWithin