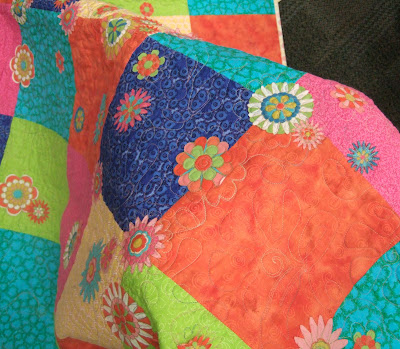
During the past week, I've continued free-motion quilting on my big Snowflake Medallion quilt. That's the pattern name, but don't you think I should name it for myself? Anyway, the more I've been focusing on sit-down quilting, the more I've come to realize there's not just one form of free motion quilting. I don't know if these are proper terms, but here are the types of sit-down quilting I'm doing:
- Free Form. That quilting is like all over quilting, and what I did here. It's when, after practicing a design on paper, or tracing it repeatedly with your finger, you know it in your head. Then, through that familiarization, your eyes and hands can communicate the design to the quilt. There's no marking the quilt. So far, for me, it's easier to quilt a single shape or motif than it is to "ad-lib." I'm not yet adept at "thinking on my feet" (or "thinking on my seat!") anticipating what lies ahead to fill in what needs filling in as I go. Ideally, I think this is the kind of quilting all of us would like to be able to do! In my opinion, it's probably more achievable on a longarm machine because stand-up quilters get a three-foot perspective. When you're sit-down quilting you have only a one-foot perspective.
- Partial Marking. This is when I need just a little guidance. It might be a circle drawn with a wash-out marker, or a wavy feather vein cut from freezer paper and pressed in place as a guide. Partial marking gives me a starting place onto which I can add free form quilting.
- Motif and Design Marking. As much effort as it takes to premark a quilt - whether drawing a design directly onto the quilt with a washout/ironout marker, or quilting through Golden Threads paper, this is the best way for me to ensure I have a complete and balanced design. Until I improve a whole lot more at thinking on my seat, I need to follow a detailed guide for most of my free motion quilting.
In the next pictures you'll see how I used Golden Threads paper to get what I was hoping for.
Motif and Design Marked Quilting
To quilt one of the appliqued motif's in the quilt, I traced this shape from the "Snowflake Medallion" pattern onto parchment paper.
I cut out 6" squares of Golden Threads and stacked and pinned 12 of them together. With the parchment paper on top and no thread in the sewing machine, I quilted holes through all the layers. Eight flower/leaf motifs are on each side of the quilt, so this 12 layer hole-quilting needs to be repeated two more times.
Straight pins hold a single layer of Golden Threads, ready for quilting with thread.
Quilted through the paper.
Some paper removed.
You can see that the paper doesn't want to come out of the double veined stem. Tweezers come in handy here.
Quilted, and the paper removed.
Echo quilting around the flower/stem motifs was by eye.
In the next area of the quilt, I wanted a motif that is 9" wide, spanning three narrow borders and flying geese blocks. I cut a piece of Golden Threads paper 9" wide and 27-1/2" long - half the length of the border. Using a fine point green Sharpie, I drew veins and feathers onto Golden Threads, checking and rechecking on the quilt that the design I created fit between the applique shapes, and confines of the borders. That eight petal flower is an applique motif I traced from the "Snowflake Medallion" pattern.
Since I needed a total of eight pieces (two pieces for each of the quilt's four sides), I cut seven more 9" X 27-1/2" pieces, stacked and pinned them together, and quilted - without thread - through all eight layers.
Perforated Golden Threads paper, ready to peel apart, pin to the quilt, and quilt.
Quilted, and the paper removed.
Even though it takes planning and drawing - the sort of prep work I don't like because it makes me in a hurry to "get to the good stuff" - in the end, it's worth the time. Don't you think it looks as good as longarm quilting? The best back-handed compliment I get is when I'm asked, "Do you quilt on a longarm?" Linda


