Wednesday, November 16, 2011

Friendship Medallion - Part 6

There's not much to say about Part 6. It's large blue and white half-square triangles added to the top and bottom of this square quilt, making it a rectangle. It's 67-1/2" X 76-1/2" now, with two more parts to go.

Part 7 will no doubt take a little time. Hmm, only 288 one-and-a-half inch white squares, and  360 one-and-a-half inch medium and dark squares to make 72 three-inch square (finished) Nine Patch blocks!

To be perfectly honest, I've had a happy accident, and am further along on Part 7 than I would have expected. You see, in October I decided to make my first ever "Leaders and Enders" project. If you don't know what this is, go here to Bonnie Hunter's site to read more about it.

Basically, it's a way to make a quilt while you're working on something else. You only need to have a whole bunch of fabric pieces cut out so that you can start (leaders) and end (enders) every seam of your current project with Leaders and Enders pieces to sew together. It's a secondary quilt to the primary quilt (or project) you're working on.

This is the basket of 1-1/2 squares I've been cutting for several months as I have systematically been working through my fabric bins to downsize. These 1-1/2" squares in my rectangle basket are the smallest ready-to-sew size I've been cutting before tossing scraps into a bag.

The Leaders and Enders patches I started sewing together in October are 1-1/2" squares. I've already sewn heaps of pairs and tossed them into this round basket.

So all those 1-1/2" cut squares - in the rectangle basket - are exactly the size needed for the 72 Nine Patch blocks in the Friendship Medallion quilt! How fortuitous is that?! I'm tickled about it because in just a couple days I've gotten a good start on Nine Patch blocks that will look like this for Part 7 of Friendship Medallion. It's a Nine Patch in a Square.
5-3/4" X 5-3/4" unfinished
Have I mentioned before how much I'm lovin' this project?! I think so. Hmm, maybe once or twice.

The colors! It's amazing to me how all my old traditional prints - many purchased in the 1980s and 1990s - look almost modern when neighbored with bright colors and a white (mostly) background. They play well together, and I love these color groupings.

Something else that's fun to do and might make you happy too... A dear friend sent me the link to a color test - a hue test - which I found quite interesting. I'm happy to say I scored perfectly, a zero. To take the hue test yourself go to: FM 100 Hue Test. I recommend you're in in a well-lit area when you take it.

What this test tells me is that even though I can perfectly line up a graduated series of hues, when it comes to choosing colors of fabrics to go together, I can still fail miserably. But maybe this Friendship Medallion is an exception. That remains to be seen. Linda

Monday, November 14, 2011

Friendship Medallion - Part 5

The first five parts of Friendship Medallion are done and it's now 65-1/2" X 65-1/2". It's too big for my design wall, so that's why it looks a little ripply on the right side - part of it is masking-taped to the concrete wall. But boy, am I likin' this or what!? 
Friendship Medallion
If you're thinking this is a great project for stash-busting, you're right. I can now get the lids back onto a few of my fabric bins!

If you'd like to join in, do! It's free.
There are no time constraints for making this quilt, just a few simple rules:
  1. No buying fabric! Make it from your stash.
  2. Swap fabric with friends for greater variety. Hence the name "Friendship Medallion."
  3. To get instructions for each step, email a picture of your finished previous step to the Patchwork Pumpkin quilt shop.
To register, just go here to Patchwork Pumpkin. Then, Therese will email you instructions to begin making part one, the checkerboard center. 


Therese emailed me to say that quite a few people are making FM since reading my blog. The world seems a little smaller for knowing that I'm sharing this with some of you. I hope to see more FMs started in your blogs that I follow.

I have FM part six in hand. What color next? Probably blue. Then two more parts to go. Funny how it works. Each part seems to take just a little longer than the previous one.

Check out my friend Kerry's quilt at ALittleStitching. Hers is an assortment of scrappy colors. So pretty! Linda

Saturday, November 12, 2011

A Stitchin' Mission Quilt

The last of five Stitchin' Mission lessons was Thursday evening. Besides teaching about quilt labels, I turned in the quilt I made that will go to House of Mercy here in Des Moines.

This quilt is sewn with fabrics donated to Stitchin' Mission by members of  Faith Lutheran Church in Clive, where our lessons were held. The design is one I call "Stairs to Heaven," and it uses only "loaves" - 3-1/2" X 6-1/2" rectangles.
"Stairs to Heaven," 48" X 60"
Whenever I have a leftover fabric I want to use up, I cut 3-1/2" X 6-1/2" loaves. They have many design possibilities for sewing into mission quilts.

See more photos of Stitchin' Mission quilts here, on the SM blog. Sixty-plus quilts were made during this series of five free beginner quiltmaking lessons! Wow! You can see the quilts in person next weekend, November 19-20 when they'll be displayed in the sanctuary at Faith Lutheran Church on University Avenue next to K-Mart, in Clive.

By the way, that is snow you're seeing in the background of my photos. We woke Wednesday morning to three inches of the stuff. Winter is officially here. Linda

Tuesday, November 8, 2011

Getting Away, to Kansas City

For four days, over the weekend, we were in Kansas City.

On Saturday I went on a day-long, 9 a.m. to 7 p.m., quilt retreat with my good friend, Carla. It was our first time sewing together, and - no surprise - we had a great time. We met up, and I rode with her to Bucyrus, Kansas, where our quilt retreat was in a church building on the grounds of this beautiful old church. 
Queen of the Holy Rosary Catholic Church, Bucyrus, Kansas
The retreat space was very large with banks of windows on three sides, and good overhead lighting.
Retreat space
Carla and I had a special project planned to work on together.
Carla
Robin joined us, bringing along her hand embroidery. She also rotary cut Carla's sewn strips since Carla is a little hand-icapped from a tumble down the stairs. Though Carla assured us she could rotary cut, watching her use her elbow to stabilize the ruler didn't reassure us!
Robin
The retreat coordinator was sewing binding on this quilt. It's a solids only quilt made from a Kaufmann Kona charm pack. What an effective, dramatic design. It's quilted with circles within circles.

One of the especially prolific quilters I became acquainted with is Nikki who blogs here. She recently finished this Spider Web quilt top. 

Her Spider Web has some unexpected details.

Nikki's hand embroidered spiders!

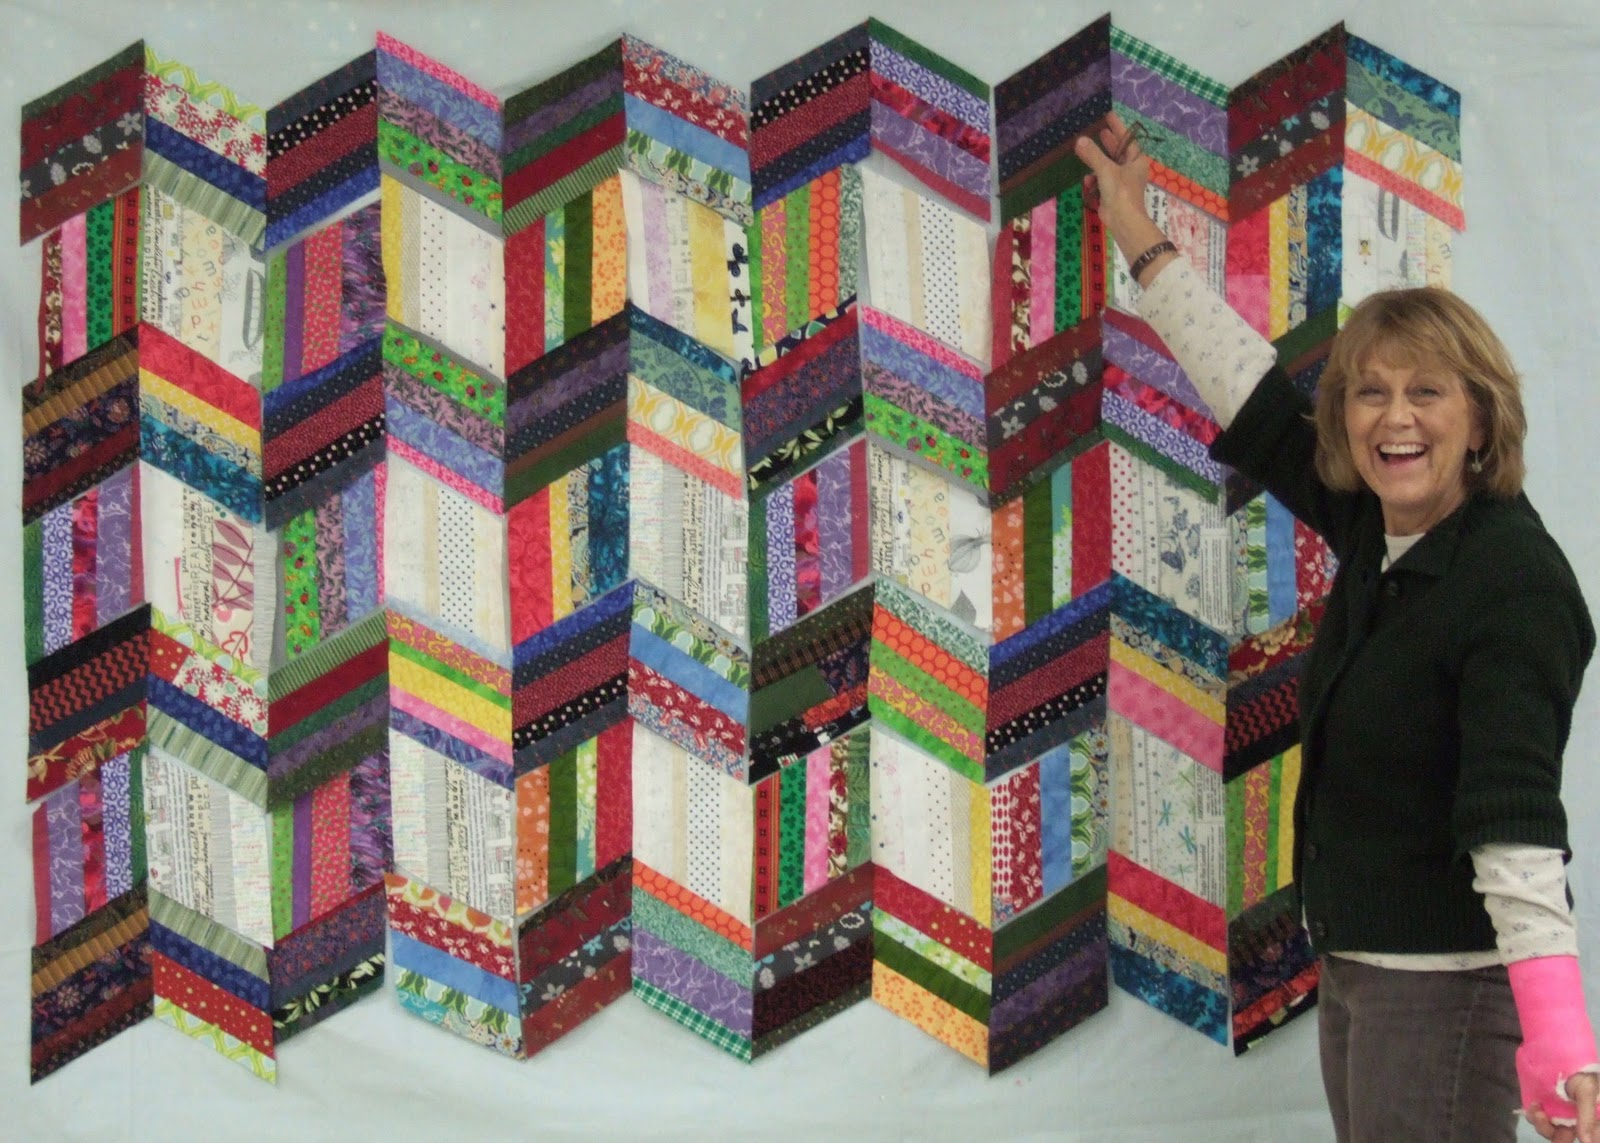
Carla and I both sewed a design called "Picket Fence." It's from an Elsie Campbell book String Quilts. Picket Fence is design in which assorted width strips are sewn together according to lights, mediums and darks, and then cut into 60-degree diamonds.

The diamond blocks Carla is happily "ta-dah-ing" on our design wall are a mix of diamonds each of us cut and sewed from our own strips stash.

Before we parted company, we swapped light, medium and dark-colored diamonds with each other, so each of our two quilts will be even scrappier.
I'm on the left; Carla's on the right
Though, based on just my strips, I don't think I'll have much trouble making my Picket Fence fairly scrappy!

After the quilt retreat, an unexpected activity found us very literally quaking in our boots! Saturday night, while at our daughter's house, were awake at 10:53 p.m. when the 5.6 magnitude earthquake rumbled three miles below ground near Prague, Oklahoma. Even in Kansas City, 300 miles (428 K) away, we felt the bed tremble and listened to the closed bedroom door rattle in its door frame. Though I knew what it was, having felt a similar tremor back in 1965 when living in Ohio, it's still not something you expect here in the Midwest. Tornados? Yes, aplenty. But an earthquake? Certainly not!

Another reason for visiting KC was to celebrate this little guy's first birthday which was Sunday. Would you believe he wouldn't eat birthday cake?! He'd never had cake, and even after a couple attempts were made to put it in his mouth, he refused it.
Aesa and Bapa
Last year I started washing and saving containers from my favorite yogurt: Yoplait. These containers are durable for chewing on, and throwing around without a chance of hurting anyone - great fun with little ones, building towers and making roads. My grandsons know I'll play "stacks" with them anytime. Here's one of their favorite things to do.

Linda

Friday, November 4, 2011

Putting it All on the Table

There's nothing like "company's coming," to get me motivated to take care of details that I've meant to do anyway, but put off for too long. A couple weeks ago I expected a houseguest for several nights. Sadly, she wasn't able to make it, but I'm ready for the next time!

Place mats. Have you made them? It seems a lot of bloggers are offering place mat tutorials. They're nice place mats. Pretty. But not designed for a round table! I've tried using rectangle place mats on our round, drop-leaf table and didn't like them. And I certainly couldn't serve my guests on a bare wood table! What to do? Design my own of course!

From a piece of freezer paper, I made a place mat template that matched the curve of the table. The place mat measures approximately 14" X 16". I figure I needed one yard each of two fabrics for the front and back of four place mats.

In my never-ending endeavor to reduce my stash, it seemed best to make some fabric from my scraps. This is what I unearthed as I was looking for the dark reds, burgundies - "wine-colored fabrics" sounds better - to coordinate with our burgundy-colored stoneware.

After several hours of sewing, this is the piece of fabric I made. It has a smattering of golds and greens too.

The place mats that would be sewn primarily from Kona Snow solid, so with my newly-created fabric I cut a decorative insert - a trim. Using a freezer paper insert pattern piece (3"-wide), I pressed it to the fabric and rotary cut.

I cut apart the place mat template and used the two pieces to cut two pieces from Kona Snow. I pinned and sewed the fabric insert to the Kona pieces. A gentle curve like this isn't difficult to sew.

Thermore batting is inside each place mat. I chose Thermore because it's very thin. For something like these place mats, it's the best batting to use so drinking glasses and wine glasses have a stable base.

When the first place mat passed my approval, I made three more. Most often, this is what our table will look like.

The place mat backs are just as serviceable as the fronts. Perhaps more so because they'll hide someone's sloppy dribbles!

The place mats can be rotated and still look nice. A few lines of staggered curved quilting is all that was needed to hold it all together.

I think these make a pretty table setting in our kitchen eating area.

What's for dinner?
Linda

Wednesday, November 2, 2011

Last Color Hurrah

We're counting yesterday's weather as a bonus day. It's rare that November 1 in Iowa is so beautiful, with the afternoon temperature reaching an unusually mild 75 F (23 C). We've enjoyed brilliant autumn colors, and haven't had to go far to appreciate them.


My own yard! In the foreground, a burning bush.

Maple trees in the backyard.

That's Dan, and Hogan the dog, walking on the sidewalk.

In the afternoon we drove to Saylorville Lake, Sycamore (boat) Access, and walked along the trail, soaking in the day.

It's a good thing we did! If we had waited until today we'd be soaked! It's not only raining, but looking and feeling very dismal. With a 30 percent chance of snow overnight, hurrah for color while it lasted. Linda

LinkWithin

Related Posts Widget for Blogs by LinkWithin