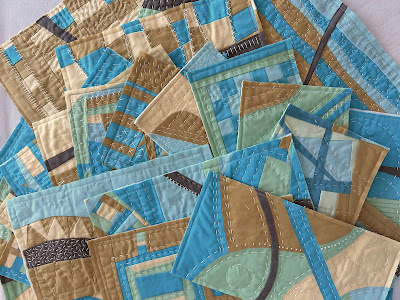
In January I posted about organizing a Modern Potholder Group Quilt. I invited 15 US quilt makers to make improv rectangle and square blocks using a specific color palette of five Painter's Palette solids.
All 15 quilt makers came through for me by the April 12 deadline I set! Those quilt makers are:
Karen @sunrayatplay
Jane @gonequiltinginflorida
JoElla @jemquilter
Betty @zcabed
Rosemary @franticquilter
Cassandra @cassandra.beaver
Kathy @kathycookquilts
Maureen @maydecemberquilts
Patty @elmstreetquilts
Debbie @aquilterstable
Candi @candipursuits
Charlotte @kirkenoll
Sherry @otterbeequilting
Elizabeth @apiecefullife
Clara @bimbambuki_blog
According to instructions I provided, each of them made one or two rectangle-shaped blocks. They're improv-pieced, and improv big stitch hand quilted (with white thread), and are not bound. I received 22 blocks.
They also made one or two square blocks which are plain with only improv hand quilting. I received 20 of those.
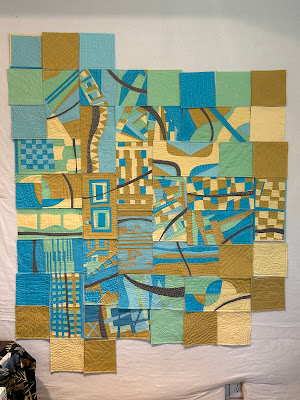
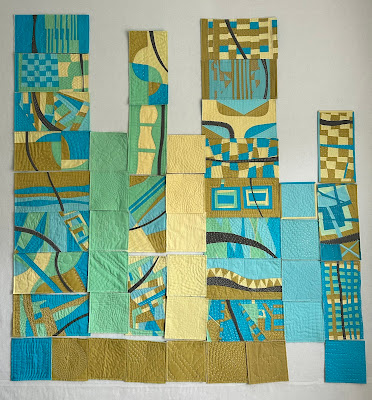
Then I spent ten days arranging, and rearranged and rearranged blocks every day, coming up with nine different layouts. A few of them are...
After angsting over each layout (designing still does not come easily to me), I finally came to the conclusion that those square blocks were not helping. When I removed most of them from the design, I felt much better about the layout. So, for now I'll focus on this section. I anticipate using the squares around the perimeter in a different way. More to come about that!
Each potholder block needs to be bound, so for now I'm starting with that. After reading-up about making a potholder quilt, I learned that weight can be a concern when hand-stitching blocks together. For that reason, I'm making single-fold binding. I'm cutting binding 1¼" wide.
At first I thought to choose binding colors to suit each block, similar to this.
But the more I played with blocks and thought about the trend we're seeing - using stripes in modern quilts - I consider striped binding. Wouldn't a gray and white stripe binding look good? Better than black and white stripe, a gray stripe would suit the Pewter-colored curved insert in each block. But I don't have a gray stripe in my stash.
However... 💡
When I looked at the back side of a black and white striped print, I knew it was "just right." And the fact that this striped fabric is printed on the diagonal is a bonus.
So this is what I'm working on now. Sewing lots of binding to blocks with the wrong side of the black and white stripe showing! (Don't ask me how many times I've already sewed a strip upside down and had to unstitch!)
The bound block on the left is JoElla's. The bound block on the right is Maureen's.
Can I just say... I'm getting pretty good at binding! It helps that I custom-made a ⅝"-wide cardboard template so I can draw and sew the perfect mitered corner.
A special thanks to Rosemary @franticquilt who suggested I piece Pewter-colored fabric into some of the bindings. Well this is gonna be extra work fun! 😀
These are ready for hand-stitching binding to the back.
After a consultation with members of Central Florida MQG, during our Saturday Sew-In, I am also considering adding strategically-placed appliquéd bias tape to some of the blocks. In the meantime, you'll find me happily making binding! Linda


oh, this is getting interesting! Sorry there's been so much 'figure it out as you go,' but looks like it will be worth it!
ReplyDeleteWhat fun this project is! And a challenge to arrange to your liking as well. And miles of binding before you sleep....
ReplyDeleteI like, really like, the pieced pewter in the binding and then how it meets up with its neighbor. I need to find a tutorial on how to make that happen. Trial and error sounds like a lot of work! Go Linda!
ReplyDeleteLinda, you are doing a great job with the layouts. I love where you are now. And that binding ! The diagonal stripe is perfect and the pewter meetups are over the top good. You love a challenge !
ReplyDeleteI knew you’d find a layout and a plan you like!! It’s looking fantastic with that striped binding and those pewter connections sre creating beautiful lines!
ReplyDeleteGo Linda! I am amazed at how your mind works. This whole project is a great challenge. Not something for the faint hearted, but certainly great to follow along from the sidelines. Do you have an inspiration quilt? And, will you join them in a QAYG fashion?
ReplyDeleteWhat an interesting concept Linda! And I love the variations and changes you are making- improvements in fact!
ReplyDeletevery interesting concept and to say I like it!
ReplyDeleteThe comment above is from me, Edith Switzerland ;-)
ReplyDeleteThis is certainly going to keep you busy - I love the different potholders and how you're trying out all the settings. I agree with you on the sulphur coloured squares and reducing the number of those and a few of the remaining plains has made a tremendous difference.
ReplyDeleteOnly one word, it's easier for me : ADMIRATION for all the process!!!
ReplyDeleteOh thank you! But I don't know if you should "admire" me, but rather you'd be justified in calling me a little bit "crazy." This design idea has been more than I expected it to me, and it will take patience and perseverance to get through the process to a finish. I think I'm up for it though.
DeleteAnother interesting idea. I rather liked the second arrangement--reminds me of the Irene Roderick quilts.
ReplyDeleteSuch an interesting process. I've done self binding on a small project but never anything like this. I can't wait to see how it comes together once the striped binding is done. I know you're up for the challenge and wish you luck with the final layout.
ReplyDeleteWow, looking good, Linda!!! You've thought out many details! Love your solution for a grey striped binding!!!
ReplyDeleteI cannot tell you how much I love this quilt. I spent more time looking at it at QuiltCon than any other quilt! Each "potholder" was a work of art and putting them together with the back side of striped binding made it even more amazing. And then you set it on an angle..... Wow!! I loved reading about your process.
ReplyDeleteThank you SO much! I can't tell you how much your kind words mean to me. I'm pleased with the quilt, though from the judge's comments, it wasn't all positive. She thought there was a "lack of diversity in color value," and "too much subtlety in color palette." However, the quilt received positive comments for "innovative and efficient construction" and "integration of the binding of each section into the design is effective." Suffice it to say I'm satisfied with it overall. But, it would be interesting to try it again with a different color palette. I very much appreciate your thoughtful comments about it. Thank you!
DeleteMmmmm. If you convert the quilt to gray scale there is a good variety of value. So that is a puzzling comment. I made a potholder quilt with hexagons but it wasn't modern. I had seen people make rectangles and squares using the Daisy and Grace templates. But yours was the first one I saw where the binding was a separate fabric applied at the end. Since seeing yours I have been searching for fabric to make a modern version. Thanks for the inspiration! Oh - I live near St. Petersburg so we are practically neighbors!
ReplyDelete