
For my newly finished sewing room, I decided to sew a few buntings to hang above the bay window. Following a tutorial by pinksuedeshoe, instead of pointy pennants, I cut and sewed 29 of these 8"-wide, half-circle pennants, that show off my pretty aqua and orange prints.

The instructions would have you clip those curves after you've sewn them. In fact, the curves need to be notched. Big difference! To notch, just pinch a fold of the seam allowance and clip through all the layers.


After notching and turning the piece right-side out, this is what it looks like on the inside of the pennant.

The outside curve needs to have space that allows the fabric to overlap on itself.

So if you're ever doing this yourself, wondering whether to clip or notch a curve, remember to "notch the mountain!"

When I was cutting and sewing miles 11 yards of bias-binding for stringing the pennants together, I knew it would be easiest to make the binding by pulling the fabric strips through a Clover bias tape-maker. Darn. I didn't have one the right size!

But I remembered an old trick that I want to share with you. Instead of pressing the binding in half, wrong sides together, and then opening it back up to press each long side toward the pressed fold, do this. Pin two straight pins into your ironing table in such a way that the opening is the exact width that you want to make the bias strip.
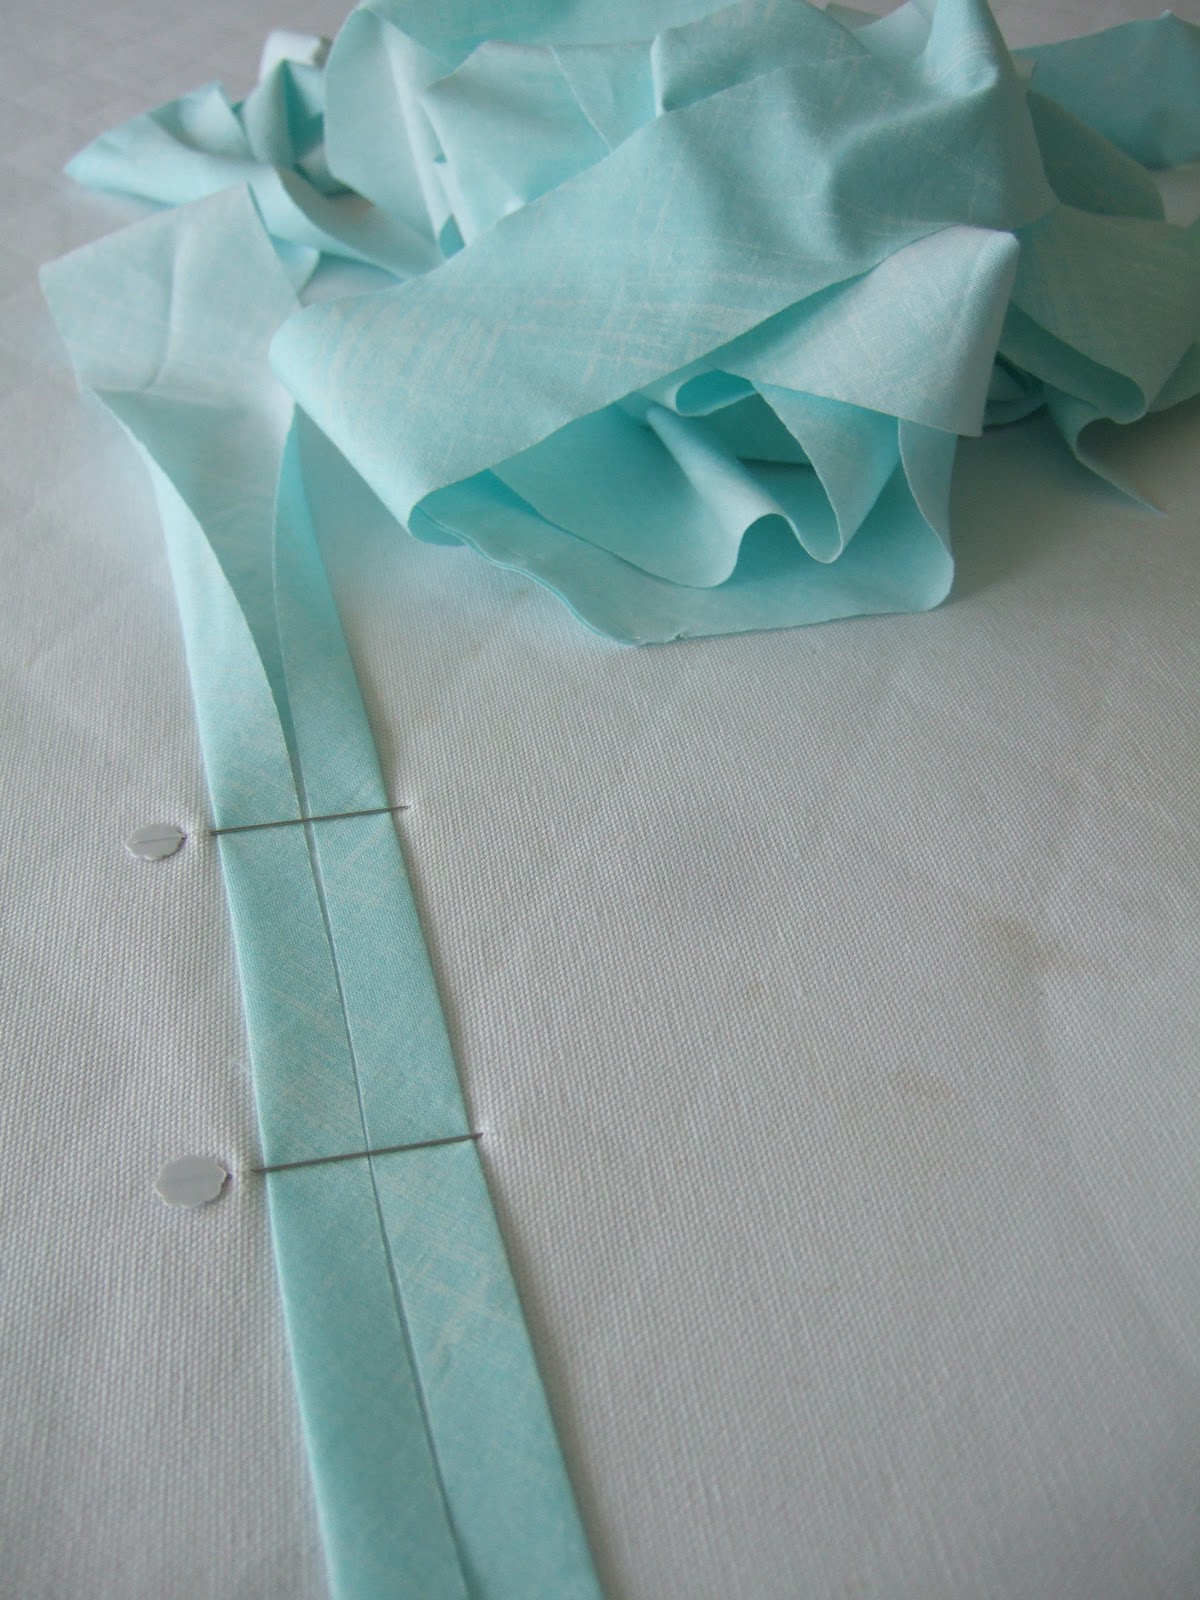
In my case the pins are "woven" into the ironing table with a 2" opening.


After pressing those two outside folds, I folded the strip in half and pressed again. Lotsa bias binding to sew pennants together! Binding is made with the pretty Painters Canvas fabric in the color "sky."

Here's the before. Plain and boring.

The after is bright and happy!


Now to make a shower curtain for the guest bathroom. Company's coming next Wednesday! Linda

How cool is that bunting! Now your sewing room is really complete (or is it?) Waiting with bated breath ;)!
ReplyDeleteYou have the best sewing tricks! I'm going to use that one for sure.
ReplyDeleteThat is so great!! And I love the colors you used!
ReplyDeleteIt so cute and colorful and makes you want to walk right into the room, play with the fabrics and sit down and sew. Very nice.
ReplyDeleteLove the bunting Linda - very cheerful! I've got to replace a shower curtain so I'll be interested to see what you do. For my last one I made a simple curtain and valance, added some jeweled edging and used a liner. I'll probably do something similar this time but without that kind of edging since it came apart when washed. :( blessings, marlene
ReplyDeleteNice touch up there :)
ReplyDeleteVery clever...and yes, I noticed your pink birds!
ReplyDeleteVery good hints!
ReplyDeleteThat's pretty darn adorable! Great job.
ReplyDeleteReally sweet bunting and I love the flamingo's really dress up the window. Thanks for idea about binding really neat and easy. Blessing Sandra
ReplyDeleteLove, love, love your bunting!! Thanks for the tip on making notches. You don't have to cut them very deep, do you? Good to know. I use my larger bias tape maker to make the sleeves for the backs of my small quilts and wallhangings. They whip up in a snap! Your place is really looking great. Your sewing area....wowza! Every quilter's dream.
ReplyDeleteYou are a mine of info on tricks and hints, Linda! I love that bunting! What a difference it makes. :) Pretty colours.
ReplyDeletegreat way to dress up the windows.
ReplyDeletecan't wait to see your new shower curtain.
I love bunting! I have plans to make bunting, just haven't been motivated enought.....YET! Love your bunting especially, the fabrics are just delightful!
ReplyDelete