Wednesday, August 29, 2012

Some of This and That

When the backing fabric for my Great Granny Along quilt top arrived last week, I promptly washed it, pieced it and set to pin-basting. This is the first time I've pin-basted a big quilt in our new house, so I had to make some adjustments. I did it in the garage!

I sure don't regret having moved my favorite hollow core doors! They have so many uses. I was able to get the two white trestle table legs (from Ikea) adjusted to the same height as two sawhorses so the doors made one even surface. I had nice weather for pin-basting, in between waving to neighbors passing in cars and golf carts. 

For those of you following our furniture shopping progress, our living room is done. There's a new clock on the wall, and the recliner and rug are in place. Since we couldn't find a rug at any of the nine or so places we shopped, we bought carpeting from Home Depot that a local man cut and bound for us.

Add this furniture consignment store find, a Tommy Bahama-style cabinet and I'm likin' how this looks. The cabinet is ideal storage for books, travel guides and maps, bible study workbooks, wedding and photo albums, Scrabble, Mexican dominoes, and playing cards that until now have been crammed into the hallway closet.

When the fella delivered the living room rug, I arranged with him to also pick up and deliver (because they wouldn't fit in our car) two 4' X 8' sheets of 3/4-inch thick Owens-Corning insulation. This is the tongue-and-groove style of insulation.
Duct tape is my friend!

It took me only an afternoon to duct tape together two sheets, on both sides; trim 16" from the left side length, and 1" from the top; wrap the whole thing in Hobbs 80/20 batting (secured to the back with duct tape); and wrap the whole thing again with white flannel (also secured with duct tape).

I also made a cutout for the electrical outlet, albeit a bit off kilter. To determine where to cut the opening,  I measured the distance from the wall corner instead of from the baseboard corner. Oops. Still, the whole thing fits snugly between the floor and ceiling, and is held securely by several 3M velcro-type mounting strips. It's a whopping 80-inches by 95-inches of creative play space!

With my hollow core doors now set up in the sewing room around the sewing machine table, and the design wall in place, I'm eager to be productive. I've begun FMQing the quilt, without the aid of the Bernina BSR. This room will be finished if I can ever find a cabinet for fabric, not seen in this photo but sitting out on the left.


quilts in the closet
Did you see my "Ugly" quilt on the sewing room wall? I've used lots of 3M mounting strips to hang seven quilts on walls in our home, with two more quilts on beds, and three on a quilt rack. The remaining 103 quilts I brought in our move are in pillow cases stacked in the guest bedroom closet. Yes, I really do have that many quilts. They're of every size - from miniatures to table runners, pillows and wall hangings, to twin through queen-sized quilts. Twenty-plus of them are earmarked for selling or donating.


It was a happy surprise to receive an email from Angela at CuttoPieces, saying I'd won a giveaway on her blog. What a thrill to receive 22 fat quarters - yowsa! - of Heather Mulder Peterson's "Seaside Cottage" collection from SprightlyFabrics. They're beautiful! You won't be surprised to know I have something in mind for them.

However, there won't be much sewing for the next several days. Our son and his family are with us, intentionally avoiding the high security around their home near the site of the Republican National Convention. While mom and dad work remotely from our house, we're taking care of this cutie...
Austin, 2 years/3 months

... which is just fine by me. Linda

Sunday, August 26, 2012

It's Been 40 Years!

Forty years ago today, we were married at Trinity Lutheran Church in Mason City, Iowa.

My mother made my wedding gown and headpiece, the latter of which was constructed with pipe cleaners! We had a small wedding with about 60 guests that cost $521. I still have the budget record to prove it. Our cake/punch/mints reception was in the church basement.

Last week we attended a social with a Hawaiian luau theme and this picture was taken of us. We've changed a little bit since 1972.

Our son, DIL and two year-old grandson who live in Tampa are visiting us. We haven't yet decided how we're celebrating! Linda

Thursday, August 23, 2012

It's a Beautiful, Bustling Day

If you watched FOX news on television last Saturday morning, you would have seen that Paul Ryan, the Republican vice presidential running mate of Mitt Romney was in The Villages. He even brought along his 78 year-old mother. The news announcers repeatedly said that The Villages is "the largest retirement community in the world." So, while I pedaled my bicycle around our neighborhood this week, I thought it would be nice to share with you what The Villages looks like from my perspective.

Let me tell you, it's growing! I can't remember when, if ever, I've seen so many houses being built at one time. And construction is non-stop. Here's a view of a nearby street. House after house being built.

This poor homeowner - where the car is in the driveway - has construction on both sides. There can be a lot of blowing concrete dust and sand to put up with.

It's really interesting to watch how quickly houses are built. That small garage on the right is for a golf cart. We don't have a golf cart garage because we have only one car and our golf cart.

Every day, rolling cantinas go to worksites selling food to construction workers. This one's a pick-up truck, but I've seen specially outfitted golf cart cantinas too.

I really admire the beautiful doors they choose for these houses.


Whenever you see a wall, as the one on the right, you know the homes within it are courtyard villas. It's interesting to see that first the walls are built, the streets are paved, given street names and signage - including speed limit signs! - the entrance is landscaped, and then home construction begins.

Here's another area of villas under construction. 

Courtyard villas always have garages on the front with back yards that are entirely enclosed with walls.

The Villages even has it's own insulation printed with the slogan "Another dream comes true in The Villages. What's in your dream home?"

It's quite a sight to see so many men (and I've seen one woman too) working on a house at the same time.

See that patch on the street in front of the empty lot? Rumor has it that this is where a sink hole occurred during Tropical Storm Debby, in June. The lot shows no signs of being developed.

Since it's not permitted to put signs in yards (not even political signs or garage sale signs) it's fairly common to read words on the window of a sold home. "Sold. Welcome Ted and Linda." Sometimes you'll see a heart with the new owner's first names. Or "Another dream comes true" which also means the house has sold.

Often, one of the first things a new homeowner will do is re-landscape.

That pile is pine straw, used for mulch. Pine straw is used in all the landscaping for spec homes, but homeowners sometimes replace it with rock.

This is landscaping I admire whenever I pass by. I especially like that the homeowners had their driveway covered with brick pavers and expanded their entrance to make a sort of patio too.  

This house, on a corner, had an extensive amount of landscaping done.

The house next door did the same, so it's pretty impressive.

Homes with swimming pools nearly always cover them with a bird cage and surround the area with privacy landscaping.

I like the stone retaining wall and that very pretty cluster of palms.

This is new landscaping since the palm trees are still propped up. I still don't know the names of these varieties of palms, but I sure like them! 

Another newly landscaped home with a couple different palm tree varieties.

Check out the driveway too. It's very popular to have one's driveway stained with a design.

When palm trees are first planted, they're left tied up like this for a few days. I think it's for ease in watering.

I also like to check out the backs of houses. Since privacy is a concern for some homeowners, they install hedges or other plantings near their lanais. It's not permitted to construct fences. The house on the left is landscaped; the house on the right is not.

This homeowner has the right idea!

On a quiet cul de sac I came across this lovely outdoor area. That's a detached bird cage.

I added this photo to remind you that in The Villages, lots and lots of people get around on golf carts.

The house on the right was landscaped a few weeks ago. Now the neighbor to the left is doing the same.

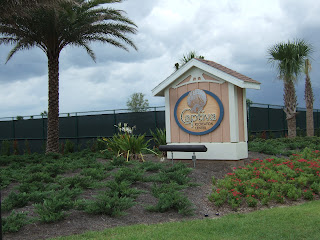
Places I frequent are: our neighborhood rec center - Captiva...

... where there's a billards room, several large meeting rooms and a kitchen. Outdoors are a community pool (children permitted) tennis, pickleball, shuffleboard, bocce ball and corn hole courts.

At Sanibel there's an adults-only swimming pool, and our postal station where we drop off and pick up our mail. We can play shuffleboard there too.

By the time I returned home from this bike ride, as you may have noticed from the skies, rain was imminent. It has rained here daily - every afternoon - for more than two weeks now. Most recently, weather reports are about Tropical Storm Isaac that will likely become Hurricane Isaac by the time it reaches Florida next Monday... just in time for the Republican National Convention in downtown Tampa. I expect that means lots more rain for us. It's to be expected when you live in a tropical area. No worries. It's a small sacrifice for living in paradise! Linda

Tuesday, August 21, 2012

No Lettuce Leaf Edges!

Everyone has a favorite method for how to put a quilt together and that's just fine with me. To each her own. But for me there's one step in the process - borders - for which there's a wrong way and a right way. The right way ensures I don't end up with "lettuce leaf" edges along the outside of my quilt.

After seeing a lettuce leaf edged quilt top on a blog post, a "How to Add Borders to a Quilt" tutorial is in order. Making a flat quilt top is all about taking measurements first, then adding borders. 

Here's how I added borders to this Great Granny Along quilt top.

Measure the width through the center. (Note yellow tape measurer at the top of the photo.) If you're uncertain whether your quilt is "square," measure again in two other places - one-third and two-thirds from the quilt center edges. Hopefully those three measurements will be the same. If not, use the average of the three numbers as your measurement.

After learning that my quilt center measured 54-1/2" wide, I used the same tape measurer to measure 54-1/2" on a 3"-wide border strip. I marked the measurement with a straight pin and used scissors to cut it.

I pinned the border to the edged of the quilt center, making sure each border edge aligned with the quilt center edge.

I cut a second 54-1/2"-long strip for the opposite end of the quilt.


If you have a walking foot for your machine, I highly recommend using it to sew borders to the quilt center. 

After pressing the seam allowance toward the border (that's the direction toward which there is less bulk from seams) I again laid out the quilt top to measure the length.

Measure the quilt center length through the center. As before, if you think your quilt center might not be square, also measure in two other places. If the three measurements are not the same, use the average as your measurement.


The length of my quilt measured 73". 


Again, on the border strip, I used a pin to mark the measurement, and scissors to cut it.


I pinned it to the long side of the quilt.


Repeating - measuring, cutting and pinning - the last two borders are shown pinned to the quilt top and ready to be sewn.


After one more pressing, pointing the seam allowances toward the border, the flat quilt top finished at 60" X 78".
Quilt and Hogan, in our back yard
If you're planning to snuggle up in your quilt, or put it across a bed, it may not be important to you how flat your finished quilt is. But if you're sending your quilt top to a longarm quilter for quilting, or you want to hang your quilt on a wall,  flat is very important! Just ask your longarm quilter how important!

I've ordered four yards of on-sale backing fabric from Hawthorne Threads. I haven't been to any quilt shops since moving to Florida two months ago! When my order arrives, pin-basting and quilting will begin. Linda

LinkWithin

Related Posts Widget for Blogs by LinkWithin