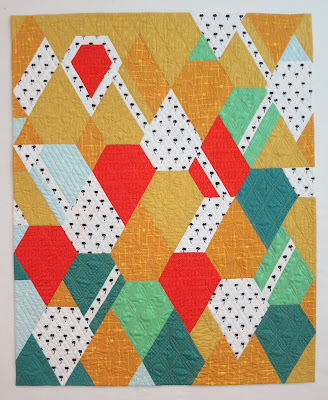
So, I'm naming this 32" X 39-1/2" quilt "Breaking the Rules: Jewels," since I not only broke the rules, but the design is cut and pieced in jewel shapes, using the Hex 'n More ruler.
 |
| "Breaking the Rules: Jewels," 32" X 39-1/2" |
You'll certainly ask, "Then why did you sign up for this challenge?" Well. It's that palm print. It grabbed my attention. What else can I say? I wanted to feature those palms in my design. Did you notice I was very sure to cut all the palms standing upright, and bending in a particular direction?
Quilting is on a grid. I followed instructions in Christina Cameli's book "Texture Quilting" to walking foot quilt a 60-degree diagonal grid across the entire quilt, followed by free motion quilting several designs in those diamond shapes.
I joined leftover batik pieces to cut one large jewel that inserted in the backing. Also, I made faced binding using the tutorial on Bernina's WeAllSew blog. This is the second time I've used this method and I really like it.
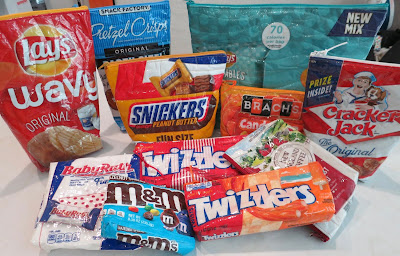
A couple days were spent making these Zippered Snack Bags from some of a few months worth of saving snack bags, candy bags, and coffee bags.
If you'd like to try making a zipper snack bag yourself, just get on YouTube and search for "zipper snack bag." You'll find quite a few videos. I recommend that you shop for fusible/iron-on vinyl that's glossy. (Vinyl comes in a matte finish too.) You can find it at JoAnn Fabrics either pre-packaged, or by the yard, the latter of which is how I purchased mine in the store.
Since I offered my selvedges tutorial in last week's blog post, I didn't want to muck it up with a book review. So I have two reviews for you this week.
 "The Alice Network" by Kate Quinn is historical fiction that delves into the past of a WWII British spy, Eve, involved in France's Alice Network, and a young American woman, Charlie, who in 1947 is looking for her French cousin who's been missing since the war's end. While this is yet another book about the war, it's very well-done - the narrator does a fabulous job - and the story adds another dimension to my understanding of life in occupied France.
Linda's score: 4.8/5.0
 I checked out "The House We Grew Up In" by Lisa Jewell as sort of an accident, when I was showing someone, on my iPhone, how to borrow an audio book using the Hoopla app. But it turned out to be a happy accident.
I've never before read a book about a hoarder, though I've watched them on TV a few times. This story is about more than hoarding though. It's about the Bird family, six people enjoying their lives living in the Cotswolds (UK) guided by a wonderful mother, Lorelei. Her primary objective is to create a home environment that's joyful and creative, and her greatest delight is Easter, when her children and others' children look for chocolate eggs in the backyard garden. However, one Easter Sunday turns to tragedy, and the family is never the same. Each person has to find himself/herself, and their journeys take many years. To me, these characters seemed over-the-top odd. I had a hard time believing a family could have this many issues.
Linda's score: 4.3/5.0
It recently struck me how beautiful our Bismarck palm looks. It began as such a small palm! Here it is in August 2014, when it was first plant.
Now is as tall as the roof of our single-story house. This is really a show-stopper, and I love that it's in our yard. Those fronds are huge - like 5-6 feet across - and make a lovely "clack" sound when the wind blows.


