Friday, May 2, 2014

Love Links

I began working on this quilt in March. I used the Quick Curve Ruler, and the instructions that came with it for a table runner, to make this scrappy-and-Kona-Snow quilt. 

Tomorrow, as a wedding gift, "Love Links" is being given to my nephew and his bride. It's 62" X 73", so perhaps a nice size for snuggling on the sofa.

All the free motion quilting was done by me, freehand, on my Pfaff Grand Quilter.

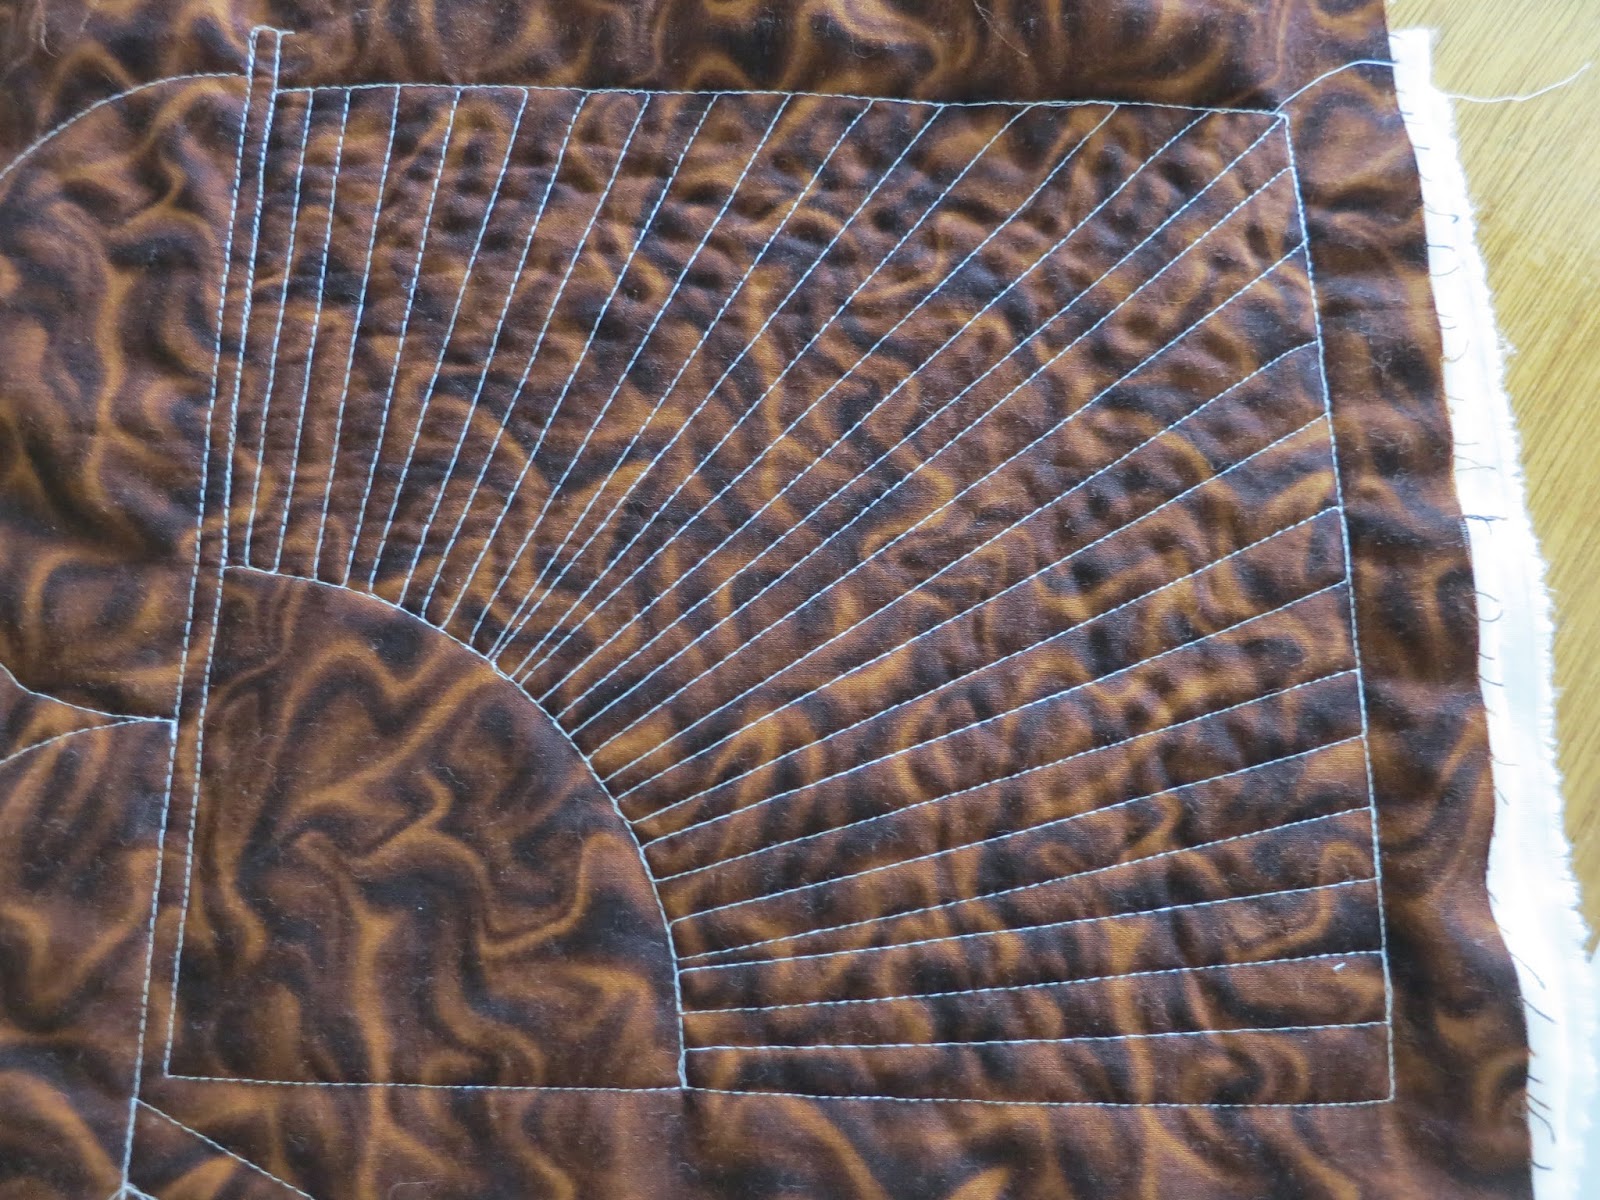
Each set of Kona Snow "links" is a different quilting design, using a pale yellow 50-weight Aurifil thread.


Batting is Quilter's Dream Polyester - so easy to work with and quilt. The softness and slight loft give just the feel I was hoping for.

In one column, where there's plain Kona, I quilted the same curve design, and then filled in with wedding information: Evan and Chelsey, and their wedding date and location. These were quilted with YLI polyester variegated.


The backing is Ikea's Britten Nummer, and binding is Prince Charming. 

I'm just terribly pleased with how this turned out. Of course, I'm hoping the happy couple is pleased with it too!
Linda

Monday, April 28, 2014

Learning from Others

I've never said I know everything there is to know about quilting. Recently I learned that I'm not producing it quite right yet, either!

I was humbled to receive quilt scores from judges who examined Bloom, the quilt juried into, and shown at the Machine Quilter's Expo (MQX) in New Hampshire earlier this month.

Here's a picture of the quilt, in case you don't remember.

I'll start by telling you I wasn't a winner. I'll even be brutally honest and show you my quilting scores:

Out of a possible 80 points, I received 64. It would have been nice to have been able to ask the judge about my thread choices - what would have been more appropriate? As for thread tension; stitch length; and starts/stops... those scores aren't such a surprise. No matter how long you've been free motion quilting - for me it's 14 years - it's tough to maintain an even stitch length (without using a stitch regulator), and those blasted stops and starts... well. Most quilters who know me know that I like to just lock the stitches and then cut them off. I know what I should be doing instead... taking the time to rethread and bury the tails in the batting. Oh, but that sounds SO tedious! 

Note the comment, on the left. If you've been reading my blog for any length of time, you'll remember that this is the quilt that I thoroughly marked up (for FMQing) with Frixion pens, in different colors. And then, after pressing the quilt to remove the marks, I washed the quilt... and every mark came back! It was a really tough lesson. No more Frixion pens on my quilt tops! Even though I touched up the quilt top with an iron before sending it to MQX, apparently I missed removing some pen color. 

This is the first time I've ever received a judges score sheet that gave me so much feedback. I'm learning, and will keep striving to improve. 

Now it's my turn to share with you! Not only about these Fine Line Rulers by Accents in Design - I really like them and plan to use them more often - but also about how nice it is to have a different quilting foot for doing ruler work. This is the open-toed foot I bought on Ebay. Though I could FMQ with the regular foot, the higher "heel" (quarter-inch thick height) makes ruler work a breeze! 

And I love that the needle is only about 3/16th of an inch from the ruler - a narrower distance for eyeballing making lines meet, as I did when I was making this elongated V. I used my curved ruler, at intervals, to achieve the cone effect. 

There was no plan to my playing as I tried out this new foot. In this design, I quilted one arc with the curved ruler, and then quilted with the straight-edge ruler. The lines aren't evenly spaced, but they could be by simply by using a measuring ruler to make a registration mark at regular intervals. 

With another curved shape ruler I managed to make clamshells. No marking!

 Effective quilting would be a different design in each clamshell.

Much like you, I find free motion quilting design ideas by observing what other quilters are doing. Here are a few (in no particular order) whose work I admire, with links to their blogs.

Domestic Machine Quilters 
Karen, Nana Girl Quilts, Florida
Marelize, Stitch by Stitch, South Africa
Patricia, Happy Days Quilting, United Kingdom
Wendy, Ivory Spring, Virginia
Emma, Sampaguita Quilts, Australia
Geta, Geta's Quilting Studio, Romania
Patsy, Patsy Thompson Designs, Ohio

Longarm Quilters
Jenny, Sew Kind of Wonderful, California 
Angela, Quilting is My Therapy, Missouri

It's apparent that I lean toward the designs of domestic machine quilters. Their designs seem more "real" to me - less intimidating than those of longarm quilters who not only manage uber-elaborate quilting, but seem to whip out finishes in no time at all!

Aren't we glad to live with technology at our fingertips, where the work of such talented women can so easily been seen?! Linda

Wednesday, April 23, 2014

I Get By With a Little Help From My Friends

As I'm off to the AQS show in Paducah this week, I am happy to have progressed on my Flower Ball quilt enough that it's traveling with me. My goal was to get all the papers basted with fabric for traveling, and I did it!

When I first laid out the 118 pieces, every flower center was empty. I couldn't decide what color to put in the centers. I thought of, and rejected, navy, brown, yellow, and gray before finally deciding that the task of choosing was too difficult. That's when I emailed Anne, from Play-Crafts (If you don't follow her blog, you should!) who I found in the past couple months. Let me tell you, Anne knows about color! Her "Color Chat" blog posts are so informative, and she makes what she explains very pertinent by choosing fabrics from her own stash to emphasize points she makes with a color wheel. Anyway, I thought that if anyone knew what was the "right" color for these flower centers, it would be Anne. She graciously swapped several emails, and looked at my pictures. 

In this picture are some of the color/fabric options I came up. Option one was to make flower centers yellow and orange, putting whatever color in the center that would most contrast with the flower. Option two was either a gray print or solid. Finally, it was a toss-up between the yellow/orange and the lower right gray solid. 

Gray solid won. It was the color Anne liked best, and I am easily influenced enough to agree with her. Yay for help with making a decision! I'm very grateful. Doesn't the dimension just "wow," even when it's just laid out?!

By the way, those tiny spots in the center of each piece are sticky dots with the piece number written on it, so I can keep track, by columns.

The Flower Ball looks like this now, ready to travel. I pieced a few of them together with light gray Bottomline thread, just to make sure they're gonna sew okay. They will. Hoping to get a lot done during quiet evenings in my motel room... but that might be wishful thinking.

I've also had a couple other helping hands lately.
Elizabeth at OccasionalPiece generously sent me a parcel with scraps and pieces of Kaffe fabrics leftover from her Lollypop Tree quilt project. I didn't have one Kaffe fabric in my stash, and I'm determined to get these 15" won-in-a-blog-giveaway hand appliquéd blocks made into a quilt. I had fun auditioning Elizabeth's fabrics. Every one of them will work! I'll have to get out graph paper to work up a design... or maybe EQ7 for the Mac will be available.

Susan at PatchworknPlay sent me a belated birthday/Easter and happy-whatever package from Australia. What an unexpected surprise! This little banner hung for about a week, before Easter. The package of sticky notes have already come in handy. 

And that cute Matryoshka doll? It's an unpicker! I already know I'm going to have to keep an eye on it. Last week, my stitching friends were looking at it just a little too closely... 

My bloggy, Instagram, quilty friends bless me! I'm feeling grateful, and singing along with the Beatles: "I get by with a little help from my friends." Linda

Thursday, April 17, 2014

Razzmatazz

Every week, all I have to share is little bits of this and that. No significant accomplishments lately, except ones I can't share yet. So here's the razzmatazz from the past week. 

A new quilting foot arrived; an Ebay purchase. It's a Janome 1660 series ruler foot that fits my Pfaff Grand Quilter. The foot has a quarter-inch "heel" (the term for the height or thickness of the foot) that is meant for ruler work - place the ruler against the heel without concern that ruler might slip under the foot. The foot on the right is the regular FMQ foot. I can't wait to give the new one a try!

The same day the sewing machine foot arrived, so did the fabrics MQG is mailing to MQGer's who signed up for the Michael Miller Challenge. By June 23 we're to come up with a quilted item using all or some of the six fabrics on the left, and any solids. Our LQS, Simply Sew Boutique is stocking the collection, so when our Central Florida MQG meeting was held at the shop, I picked up a few more coordinates. I melt over those Moda Bella solids - Bermuda (top right) and aqua. 

During quiet time, usually when I'm away from home, I'm still hand-baste foundation paper pieces for the Flower Ball quilt. I have just a few more papers to baste and then the hand stitching begins. I'll use 60-weight light grey Bottom Line thread for that step.

When I saw Debbie's post with pictures of a very pretty pillow, I knew I'd found my next (of four) pillow for our sofa. The tutorial for "Christmas Snowflake" is on Flickr, and despite the name, I don't think it will look Christmas-sy in these colors. I've cut enough pieces to make two 20" blocks, one for each side of the pillow.

Anticipating seeing grandsons in several weeks, I made another pair of shorts - the fourth pair I've sewn in the past weeks. This Angry Birds fabric came from Fabric.com. I know they'll be a hit with Austin, who will be four years old on May 6. Again, I matched the front pockets to the shorts fronts.

A big task that has taken up much of my time has been designing this quilt top. You wouldn't think it would take very long, but I've been designing with a mind toward teaching newer quilters how to sew on the diagonal - triangles, to be precise. With many ways to making flying geese, half-square triangles, quarter-square triangles, and the like, I attempted to put a dab of each into this 54" X 60" design. Not having design software, I found myself wasting quite a bit of fabric (Zen Chic; Kona; Bella) and having to wait for a reorder. EQ7 for the Mac is supposed to be released in April, and I couldn't be more anxious to use it. This project needs a diagram, yardages calculated, written instructions.... and someone to test it before May 21!
One Way/Any Way, 54" X 60" for Beyond First Time Quiltmaking class
Hmm... I'm noticing a distinct partiality to certain colors in all three of my current and upcoming projects! I see I need to step out of the box one of these days!

As always, I'm doing what I love! Next week sees me flying to Paducah for the AQS show! Excited to go, but dreading the flight. Say a prayer for my flying fear, please. Linda

Tuesday, April 8, 2014

Name Dropper

When I get into a project, my sewing room gets messy, especially when pull out the serger for garment sewing. Who needs three machines set up at once?! I do!

On a recent Saturday afternoon I dug into two large garbage bags of selvages I've collected over the years. I pressed them, and then began sewing to remove the excess plain white areas. Here you can see the several inches of plain selvage that I didn't want to include in my strip.

Putting together the right sides of the selvage strip, I eyeballed where the prints met. 

Then, I sewed a seam...

...and cut to remove the plain white. 

Here you can see seamed strips - some of the same selvage strip, and some from two different strips sewn together. Mostly I tried to sew together similar colors, but didn't stress if they didn't quite match.

As I was choosing selvages, I enjoyed picking brights and the names of some of my favorite fabric lines and designers. Because I found so many celebrity quilter's names, this project is called "Name Dropper."


Riley Blake selvages are always fun because of the shapes of the color windows. See the puzzle pieces here?

This project also included my special, saved typo selvages. To date, I have found three spelling mistakes on selvages. Here are two of them: "gaden" and "photograqhy." One more, not shown is "bijouxl."

And voilá! My Name Dropper Skirt! A good fit, but a little stiff because selvages are sewn to a foundation cut from white Kona. The typo selvages are together in one corner - lower left, in this picture.
skirt front
I wore it around the house for a while, and sat in it. Just like a regular skirt, it wrinkles.
skirt back
I expect to wear Name Dropper when I'm in Paducah, from April 22 to 27, for the AQS quilt show. I'm excited about going - even though it's for a job. A tough assignment, you know.

Thus far, from selvages, I've sewed three pillows, three totes, two Edith zip bags, and this skirt. In spite of all that sewing, I've hardly made a dent in my selvage stash. What shall I sew next? My friend Carla has some great ideas! Just head over to Lollyquiltz blog to read her series of posts about clever ways to sew with selvages: a little girl's skirt, an upcycled bag, and stationery - lots of selvage-using inspiration! Linda

Monday, March 31, 2014

Sewing Shorts

If nothing else, I'm writing a new post to push aside my Pantone quilt, which didn't do well in the challenge. The piece that won is gorgeous... and so small! Makes me wish I hadn't put so much time into a larger project that I don't even like very much. "Perspective" is the only thing that redeems it! I'll be hanging it in my sewing room with the word side out.

For something different... Sometimes it's nice to sew clothes again.

I come from a background of home sewists. My mother was the best at garment construction. In a week or less, she could whip up a new outfit for herself or us two girls, even when working full time. She always sewed new Easter outfits for us and herself, and I remember one time when she even made my sister and me purses! They were white fabric, drawstring top bags, and inside, for stabilization was a Quaker Oats container! So economical, and clever! There wasn't much that she couldn't sew. At one time or another, each of us wore a home sewn swimming suit, dress coat, two-piece suit, wedding and bridesmaid dresses... and those were just a few of the items she created!

On the right is our mother, perhaps in the early 1990's, modeling a wool suit and blouse she made and entered in the Make It Yourself With Wool contest. She won first place, in her region and age division.

An upbringing in such a household led both my sister and me to do our own sewing. For me, quilting came later, but it's still a treat to sew clothes. I'm a dress and skirt kind of gal, and still like to make the occasional outfit for myself. I had hoped to someday have a little girl to dress up again, but with four grandsons born into our family that isn't going to happen. To be honest, I find it difficult to not become overly jealous of my friends who get to sew cute girl clothes for their granddaughters.

So, I look for reasons to sew for grandsons. I'm grateful to SewKellySews on Instagram, who recently posted a picture of Minion fabric. That was all the excuse I needed to sew shorts for two grandsons - the brothers who are 13 months apart and "speak" Minion to each other. They're a hoot.

The fabric came from Spoonflower - two one-yard Kona pieces. One print has a pale green background and the other, a light blue background. 

The little drawing Jorren drew on the packing slip made me smile.

This shorts pattern is a purchased download from DanaMadeIt. It's nice because I have 11 sizes, and a number of styles. These are sizes 3 and 4 boy's shorts with front pockets. See how I even matched the print of the pocket Minions to the shorts fronts?!

Too bad I don't have any models nearby to put them on and show you how they look. I hope they'll like wearing the shorts, and look as adorable as I think they will. Linda

LinkWithin

Related Posts Widget for Blogs by LinkWithin