Wednesday, February 27, 2013

Web Tutorial

In 2006, I was asked by Landauer Publishing to write a beginner quiltmaking book: "First Time Quiltmaking." It is based on the series of free quiltmaking lessons I've offered through my program, Stitchin' Mission.

In classes, I teach a step about how to put together sewn blocks. Initially, this was called "making a spiderweb" because that's what it looks like. Landauer suggested spiderweb wasn't such a pretty word, so it was shortened to "web." For the book, I sewed samples and we photographed the web-making process. Then, editors decided not to include it in the book because it was too difficult to see!

So after being asked several times for a tutorial on this (thanks Des Moines MQGer's), that's what you're getting.

In a nutshell, making a Web is a process for:

  • keeping blocks organized just the way you laid them out;
  • and, economizing on time and thread to put together a quilt top.

For this tutorial, I prepared 6-1/2" X 6-1/2" (unfinished) blocks to make a 36" X 48" baby quilt for Project Linus.

Terminology
Eight blocks running vertically are in columns - column A; column B; column C; and so on.

Six blocks running horizontally are in rows - row 1; row 2; row 3; and so on.


Remember this by thinking of an electronic spreadsheet with alphabetical columns and numbered rows.

Marking
Until you get the hang of columns and rows, it's helpful to use flat-head flower head pins, or sticky notes to remind you of positions.

You don't need to do both. Just mark according to your preference.


Sew a Web
Place blocks in column B, right sides together, on blocks in column A, as shown in this photo.
Row 1 column B block is right sides together on row 1 column A block; row 2 column B block is right sides together on row 2 column B block, and so on.

After putting block pairs together, pick up pairs keeping row 1 on top, followed by row 2, row 3, and so on. If you've used a pin at the top of the block, this will be a reminder that, "I'm the first pair of blocks." Otherwise, you can pin your sticky note to the top block.

Take the stack to your sewing machine, keeping the pin on top. Sew together A-B from row 1.

Without cutting threads, feed A-B row 2 under the needle. This is called chain-piecing, or chaining. 

This is what the thread looks like between blocks.

Continue chaining together all A-B blocks through the last row. For my quilt, this was eight pairs of A-B blocks.

Here, the A-B pairs are sewn and back on the design wall, ready for the next step. Only the chaining thread between each row is keeping them together.

The next step follows, but please read ahead before continuing.

Place column C blocks - right sides together - onto column B blocks.


Here, each row of column C blocks are, right sides together, on top of column B blocks.

At this point, you are probably noticing that this will be awkward to take to the sewing machine. It's necessary to explain it this way so you can understand why it's better to do the follow:

Simply pick up and make a stack of every row of column C. Keep row 1 on top, followed by row 2, row 3 and so on. Take the column C stack to the sewing machine.

More than likely, you've kept the sewn A-B columns at your sewing machine anyway, as shown in this picture. That makes it easy enough to return to your design wall and pick-up/stack column C and return to your sewing machine.

As when sewing together columns A-B, join column C to column B. Chain-piece together each row of column B-C blocks.

I bet you have this figured out now, so it won't be a surprise to know that you'll continue putting your top together by stacking column D and sewing it to column C; stacking column E and sewing it to column D, and so on.

And if you've got it down pat, you can stack and line-up all the columns. No hopping up and down from the machine to the design wall and back again.

When you've sewn together all the columns you've got a Web! Yay for you!

I pinned my Web to the design wall so you could see what it looks like. Every block is where it's supposed to be, with columns joined to one another and "Webs" connecting each row.
A big picture, to see those connecting chain threads.
Pressing
The first time pressing is needed is now. With the back facing up, press seam allowances one direction in each row. It doesn't matter which direction you press, only that each row alternates direction.

Here's a close-up of seam allowances going opposite directions, and chaining separating rows.


Joining the Web
This step can be done at your sewing machine, but for purposes of explanation, I put my Webbed quilt on the design wall.

With the quilt facing up, lay row 1 on top of row 2, right sides together.

If you're a person who likes to pin, feel free to do so.

When pinning at seam allowance intersections, do not pin through the seam. Doing so only pushes apart the accurate intersection we're aiming for. Instead, butt together the seam allowances and pin on both sides of it. 

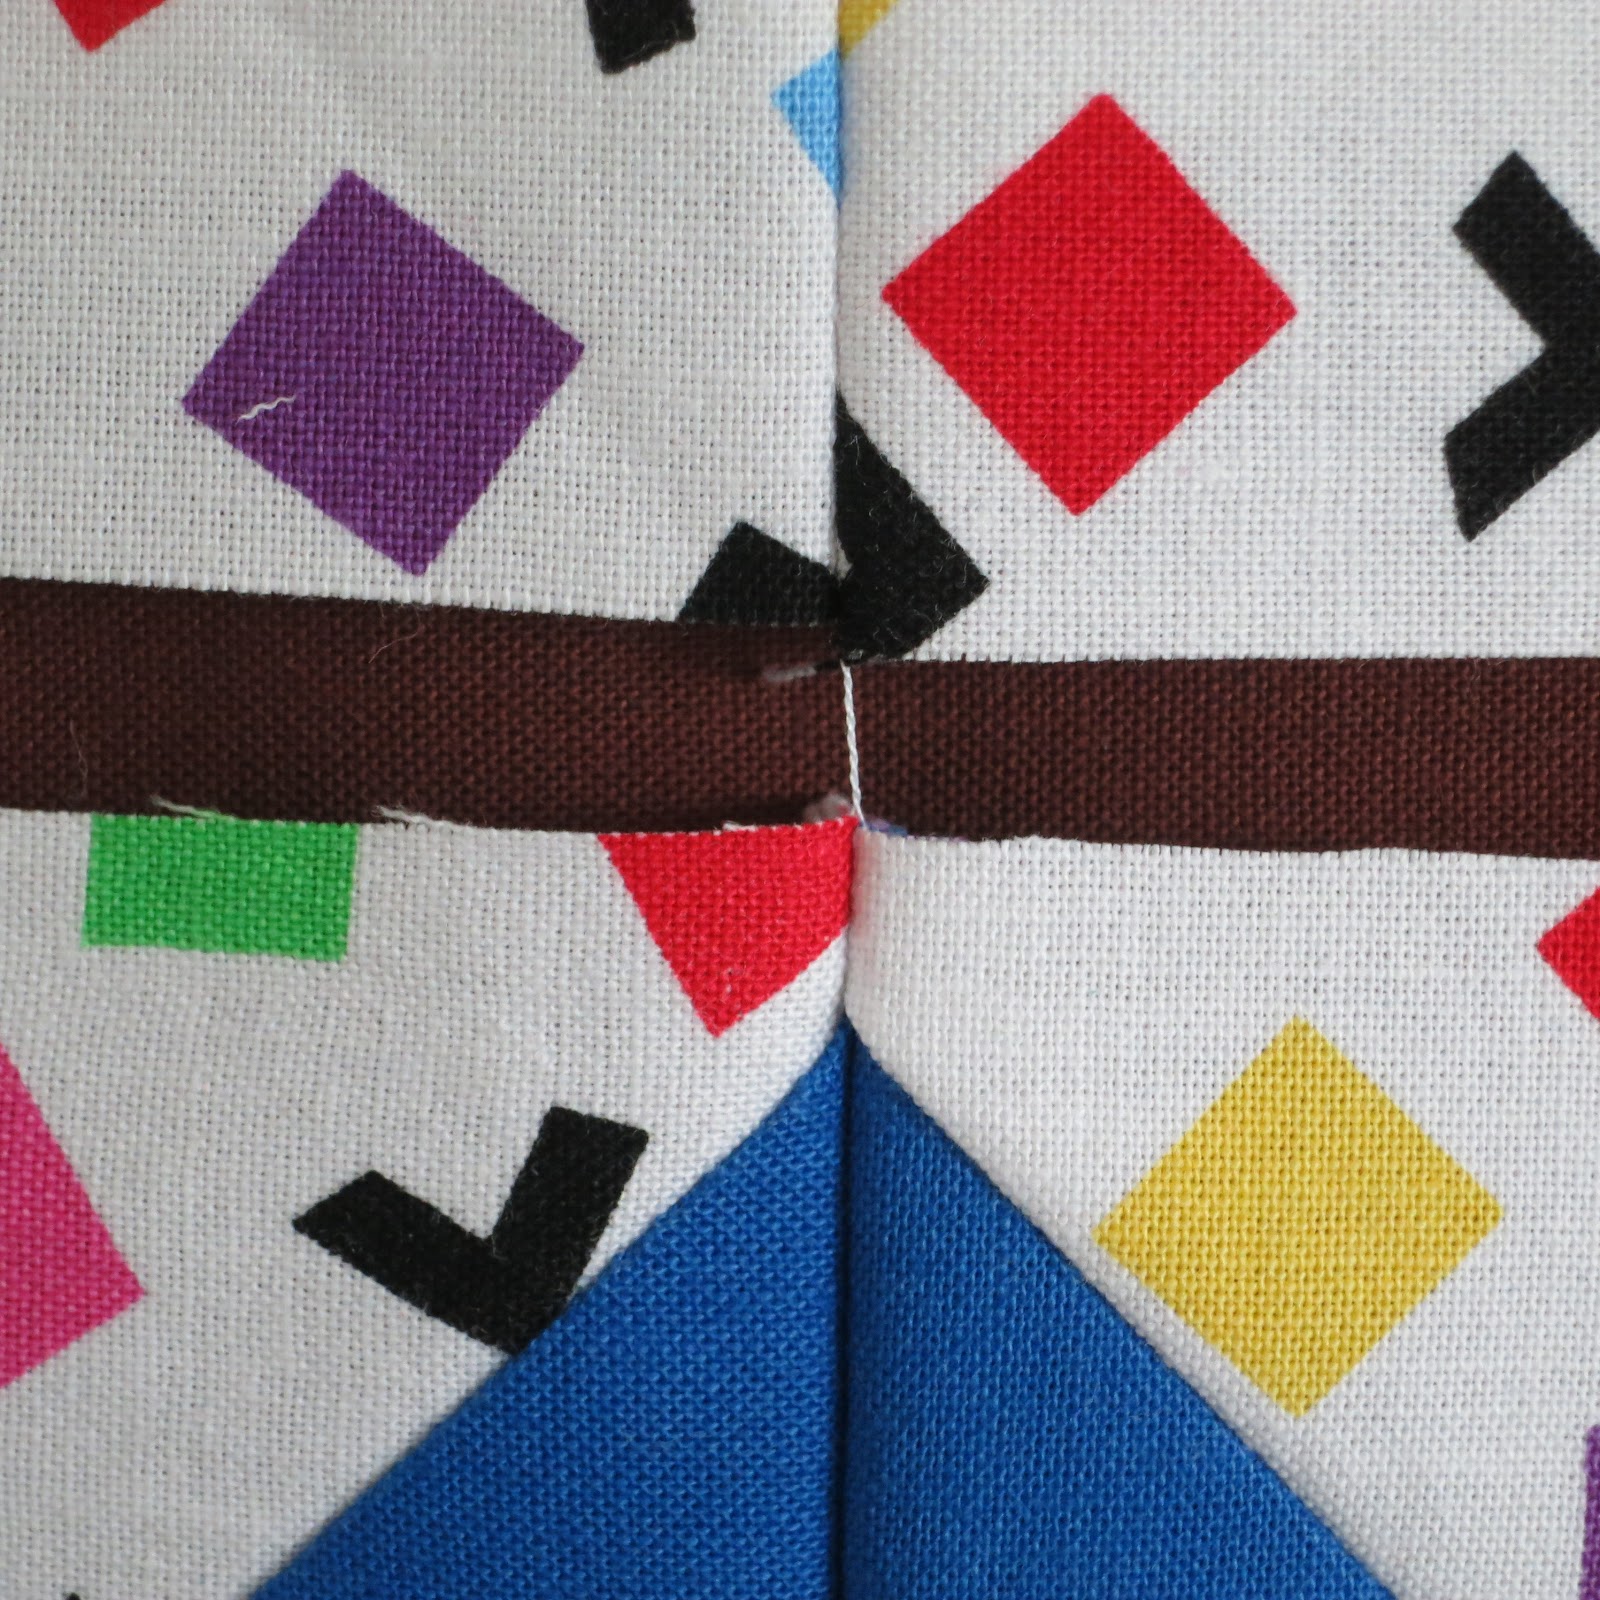
This is what you're striving for. A tight joining - also called "nesting" - with seam allowances aiming opposite directions.

Sew to join row 1 to row 2, backstitching at the beginning and end of the row.

Still with the quilt facing up, place row 2, right sides together, on top of row 3. Pin if desired. Sew to join row 2 to row 3, backstitching at the beginning and end.

Another nested and pinned intersection.

Continue in this manner, sewing row 3 to row 4, row 4 to row 5, and so on, to complete your quilt top!

Final Pressing
Press row seam allowances one direction. Whether you choose to press them up or down doesn't matter.

My completed quilt top didn't take long to sew together, and more importantly, none of the blocks got turned the wrong direction.
36-1/2" X 48-1/2"
Please let me know if you use this Web method of piecing your quilt tops. Nothing would be better "payment" than knowing this tutorial has been helpful. Linda

Monday, February 25, 2013

Slow-go UFOs

No new UFO finishes, but progress is a good thing.

Though I've stopped doing hand appliqué because it's such a slow process (for me), I've vowed to finish the hand appliqué UFOs I've started. This 20" x 20" Hawaiian appliquéd palm fronds piece was begun in 2008. Finished as either a wall hanging or pillow, it will find a place in our Florida palm tree-themed home.
20" X 20"
However, it will remain a UFO for a while because I've run out of the exactly-the-right color (894) Mettler #60 thread, and can't buy it locally. (sigh) I'm so weary of having to mail-order everything.

My UFO Bonnie Hunter "Roll, Roll Cotton Boll" (RRCB) mystery quilt was offered in December 2010-January 2011. I haven't touched mine since then, though I had even pieced the last border's parallelograms before putting it away! Happily, it didn't take long to complete the top that measures a whopping 86" x 101".


The weekend was spent rearranging my sewing room so I could pin-baste.


Besides RRCB, I basted this 55" X 70" UFO (no name yet) from 2011 when I was in the One Block Over bee. Would you believe... all my safety pins are now in quilts!

Because I had an I'm-tired-of-moving-around-this-pattern-and-fabric moment, I sewed this skirt one afternoon last week. The pattern was a bargain purchase (like $1) from Fabric Recycles, a Kansas City business that operates on the concept of buying, and then reselling, perfectly good sewing and quilting fabrics, notions and supplies. The store was the recipient of 70 quilting and craft books I divested myself of before moving last year.

My skirt was made from one yard of home dec fabric. Like it!

Now back to those UFOs and re-rearranging my sewing room for some time-consuming FMQing. Linda

Thursday, February 21, 2013

Hogan Update

Hogan, our beagle-chow rescued dog, had surgery on Wednesday. We took him to Gainesville to opthalmologic specialists at The University of Florida.

Since at least 2009, Hogan has been blind in his left eye (on the right, as you're looking at him). We've been treating his eye with prescription eyedrops, but have slowly been losing the battle. In the past couple months, he's begun to suffer - with headaches to migraines - from gradually increasing ocular pressure due to glaucoma. The evening before surgery (when this photo was taken), we could tell he wasn't feeling all that great. The vet told us that the morning of surgery, Hogan's eye pressure was 81. Normal is in the 10-20 range.

Following surgery, he spent an overnight. And boy, were we anxious to get him back! We've been assured that he began to feel much better after his eye was removed. No more pressure. But it will take some time until he's back to himself. He definitely does not like the E-collar (Elizabethan collar) which gets in the way of drinking water and eating - hubby holds a bowl up to his mouth. Hogan will either adapt to wearing the collar, or be bumping into doorways and furniture as he is now until March 4, which is when his sutures are removed.

The vet told us what a good boy he was post-surgery, even allowing them to hold an ice pack over his eye socket for ten minutes at a time.

Whenever I look at him, it makes me terribly sad. We're babying him like crazy. Linda

Tuesday, February 19, 2013

Family Time

What can you find to do in Florida when your 14 year-old granddaughter comes for four days? Plenty!

A day at Universal Studios' "Islands of Adventure" is a wonderful outing, especially when it includes our Tampa family.

Our favorite area of Universal was Harry Potter's Village of Hogsmeade.


Austin was enthralled with the croaking chocolate frog in the window of Honeydukes Candy Shop.

Hogwarts Castle is not to be missed! The indoor ride is amazing! While strapped into our seats, we flew on a broom, alongside Harry, over the quiddich field and Hogwarts. Truly! How did we do it?!

In spite of overcast skies that spit rain until late afternoon when it then turned into a steady drizzle, it was a great day. When the weather isn't nice, people leave early, and lines to rides are shorter - and in the case of "The Adventures of Spiderman," short enough to go on the 3-D ride two consecutive times!

Celina's visit to The Villages wasn't complete without a golf cart ride. Being 14, the legal age to drive a golf cart, she didn't miss the chance for driving lessons with Bapa.

Funny. One of Celina's several petitions to her parents - when she asked if she could extend her visit with us - was to improve her driving skills! (Of course, mom and dad said no, she had to return to school today - Tuesday.)


Another, not-to-be-missed Villages activity is dancing in the square - three squares to choose from, each with live music. Bapa and Celina rocked out to 60's and 70's music played by Uncle Bob's Rock Shop.

At the Saturday Farmer's Market, we couldn't pass up these fresh, juicy, Sweet Navel oranges grown about 20 miles from The Villages.

We've gotten into boccé ball, so that means we're teaching our family to play too.

It's a game for everyone. Our son, Brent, quickly caught on...

...as did our DIL, Lyn, who is a natural.

It warmed my heart to see these two cousins together, who rarely see one another.

I had just demonstrated the yoga tree pose to Austin and he showed me his version of it, accomplished while hanging onto the door frame. Giggle.

For a creative activity with Celina, I took Pokey's lead to color mugs with Sharpies. The plain, 12-ounce mugs are from Tuesday Morning. Celina decided to color her mug to leave for guests to our house. Natch', it has palm trees on it!
front of mugs
back of mugs
Per instructions, we baked the mugs in a 350-degree oven for 30 minutes. But, in spite of hand-washing only, some of the color is already coming off the rim and handle of my mug. Someone on Pinterest wrote that Sharpies should be "oil-based," so I guess mine weren't.

Celina flew safely back home on Monday, and we're missing her a lot! She was a perfect houseguest and we enjoyed her company immensely. Happily, the feelings were mutual. We heard her tell some of our friends, "I want to be retired!" and "I'm going to go to college at the University of Florida so I can visit Nana and Bapa every weekend!" Gotta love a grandchild who thinks you're fun to hang out with. Linda

LinkWithin

Related Posts Widget for Blogs by LinkWithin